
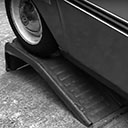
The majority of the day was spent replacing the stock General Electric 48 volt motor with the ES-40D-56 from D & D Motor Systems. A local CitiCar enthusiast handed me a set of ramps from his garage, and it helped make the process of jacking up the car a bit quicker.
The first thing I did was to dethatch and remove the lead acid batteries.

The process of taking the motor off of the car went pretty quick. I was aware of the seal that I had the break, and that I would have to be ready to catch differential fluid. Just like last time, the final step of lowering the motor from the car proved to be a bit difficult. My pinky finger ended up being crushed for a brief moment with 60 pounds of copper.
I had a question that I shot over to the C-Car community in how I could add the intake vent onto the new motor. In the meantime, I moved to the next thing I could tackle.
Removing cables
I started removing every battery and motor cable from the car. I was surprised to find that the main fuse for the motor itself was almost blown. Rather than one, the car had two separate fuses. One of the 250 amps fuses had already blown, and the second was on its last leg.

Driving with only one semi-in-tact fuse is a bit concerning. I’ve seen the amps around 250 when starting to go up a hill, and once spiked at 350 amps. If I had continued to drive around with these fuses, I would shortly find myself in quite a pickle.
Controller Nostalgia
Although the motor controller no longer had any of the thick cables connected to it, I was able to confirm that the contactors would activate as I pressed down on the accelerator. I was delighted at the results and decided to keep the contactor.
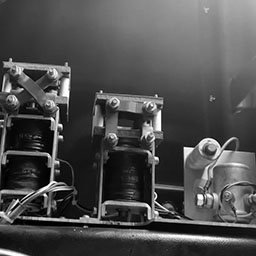
I’ve got a little project after the conversion to set up a special “user mode” that will activate the contactors while mimicking the original speed jumps/jerking with the motor controller.
Air Intake
I got a few conflicting responses, but the general consensus was that cutting into the case itself would compromise the integrity of the motor. I settled for drilling a few holes into the side of the motor plate, and threading two on the face to attach the original intake.

I didn’t attach the vent for air to exit the motor. The D&D Motor has holes along the entire circumference on the other end of the motor. Another approach is needed to evaluate if the air can be captured, or if a different heating source should be used to heat and defrost the CitiCar.
Mounting the Plate
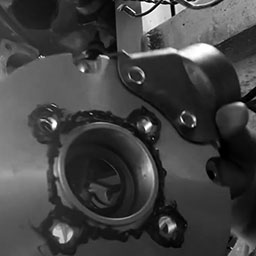
A thin material was found between the differential and the original motor plate. There was a red sealant in some areas as well.
I cleaned it off with break pad cleaner and then used a gasket maker to draw an outline of silicon around the hole and the bolts.
Afterwards, I tightened everything by hand and let it sit for awhile before tightening with a ratchet.
Motor Bumper
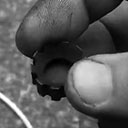
I learned previously that many golf carts often have a spline motor bumper rubber grommet that sits inside the shaft to reduce the vibration of the motor shaft hitting the metal. I didn’t find it in the CitiCar’s stock motor, so I picked one up. I covered it in some grease and stuck it down into the new motors shaft.
New Motor
The last part was actually installing the motor. It was simply lifting it up on the jacks and tightening some bolts. Once the motor was in, I lowered the car. Without any batteries, I pushed it into the garage.

