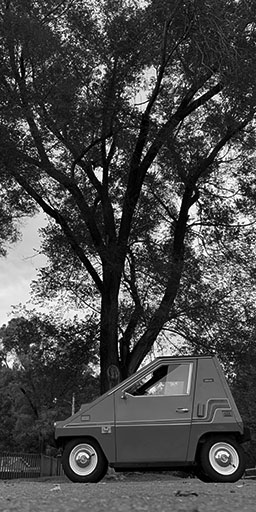
National Night Out is next Tuesday. After picking up lunch at Popeyes, Teddy and I headed over to the new Front Royal police department in our CitiCar to pick up a little “Thin Blue Line” flag and a 3 watt blue light. Afterwards, we headed over to Chimney Field park.
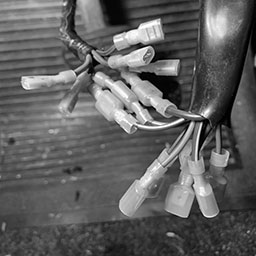
The Blue Line flag and a blue light
I need to pick up a little inverter so I can use my bedside lamp with my car to power the light during their cruise for the event. I tried to see how to affix the flag to the car, or just put the flag itself on the radio antenna, but I wasn’t having much luck.
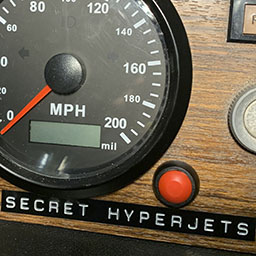
Red Button
Trip odometer button
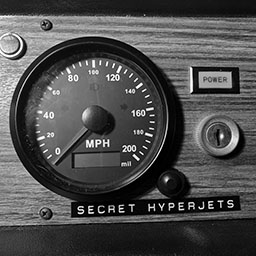
In the movie, Spaceballs, Barf switched the Eagle 5 to use Secret Hyperjets on the Eagle 5 to go into hyperactive. Men in Black had a hyperdrive on their car. Hyperdrive mode was activated by a red button that allows you to drive on the ceiling of a tunnel to bypass traffic.
With a recommendation from the C-Car owners group, I swapped out the trip odometer button for a red one. It’s already been catching peoples attention quicker.
Little red trip odometer button for secret hyperjets
Door Windows
I talked a bit with my neighbor regarding the various windows on the vehicle. He repairs automotive glass, but nothing like what the CitiCar has. He had some insight regarding the blue tint on most vehicles, having a company get measurements in case the back window breaks, and what could be done about the side windows.
I called up a company he recommended. Their first response was that they don’t do curved auto-glass. They seemed pleased that I am able to pop out the side windows and bring them in. I’ll take them over later in the week. Hopefully they can pop out the acrylic panels from the frames.
Sliding windows popped out of CitiCar doors
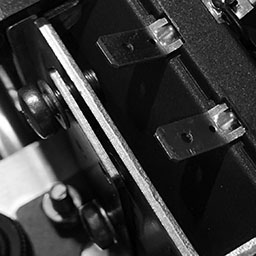
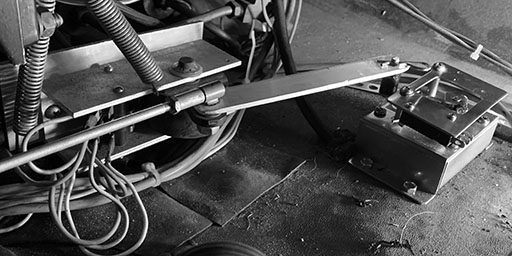
Contactor Mounting Bracket
Mounting bracket screws are too long
The wrong mounting hardware came with the Albright SW180 main contactor switch. The bolts were too long and could not tighten any further once they pressed against the solenoid. I found a bracket kit from Arc Components Limited located in West Yorkshire, England and had the parts imported.
Albright Bracket Kit Part No 2159-047
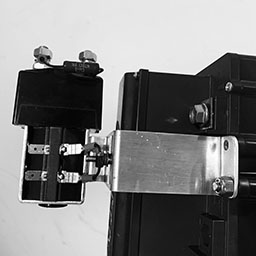
Main contactor switch secured onto Alltrax motor controller
The mounting hardware was perfect and looked fairly similar to the hardware used on the SW202 Forward/Reverse contactor switch.
Now that the contactor switch is secured, I can start modifying some steel brackets to affix the motor controller and FNR switches onto.
As a bonus, I got a little magnet from the company to put on my refrigerator.
Refrigerator magnet from Arc Components Limited, West Yorkshire, England
Lester Charger
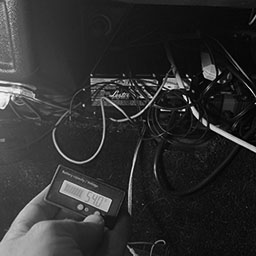
I’ve been talking with tech support for the Lester Summit Series II charger regarding the egg smell, high voltage, large jump in SoC, and odd estimates being off by hours.
So far, things seem like it might be normal. Problems may be due to the age of the batteries, and that the batteries should wear in after a few charge cycles. I think the estimates being off by a factor of four may be due to the low number of amp hours the batteries have. The range that I have on the CitiCar also seems to be about a quarter of what it should have if it came with the proper batteries.
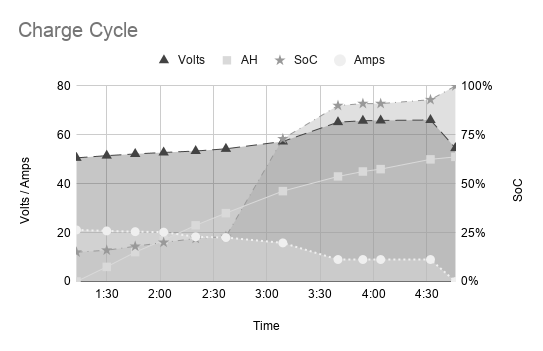
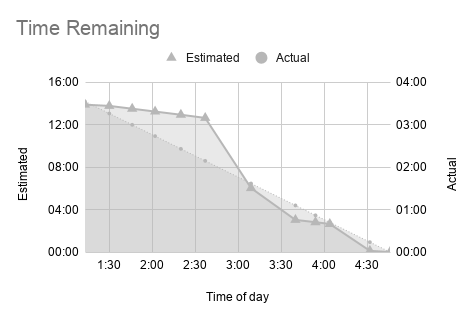
Here is the data from a charging cycle along with some visual graphs.
Time
Est Min
Amps
AH
Volts
SoC
Estimated
Actual
1:13
834
21.1
0
50.6
15%
13:54
03:33
1:30
827
20.7
6
51.5
16%
13:47
03:16
1:46
811
20.4
12
52.2
18%
13:31
03:00
2:02
795
20.2
17
52.8
20%
13:15
02:44
2:20
777
18.3
23
53.4
22%
12:57
02:26
2:37
759
18.0
28
54.3
23%
12:39
02:09
3:09
362
15.8
37
57.3
73%
06:02
01:37
3:40
182
9.0
43
65.2
90%
03:02
01:06
3:54
169
9.0
45
65.8
91%
02:49
00:52
4:04
159
9.0
46
65.9
91%
02:39
00:42
4:32
7
9.0
50
66.1
93%
00:07
00:14
4:46
0
0.0
51
54.6
100%
00:00
00:00
A high voltage applied to the 48v battery bank, and an odd 50% jump in SoC within a half hour
Graph indicating estimates are four times longer than actual charging time
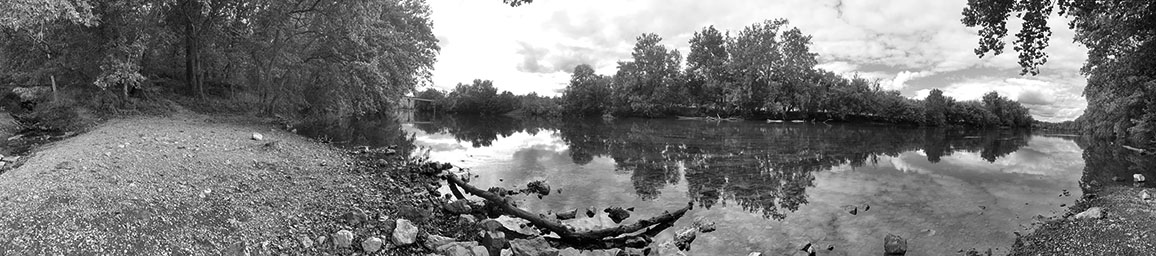
A little resting area by the Shenandoah river in Eastham park
Teddy and I slept in today and woke up late. After grabbing a meal, we headed out to Eastham park in the CitiCar.
Another great day. We grabbed a bench and watched a few people float by on canoes. Front Royal was designated as the “Canoe Capital of Virginia” in 1999. We are often seeing people in canoes when we walk along the river. One couple had a dog with them, but Teddy wasn’t paying much attention to its parking.
We headed down the trail and I let Teddy loose for a little bit in the dog park. Afterwards we continued down the path until we reached an area that comes down to the river itself. Teddy drank a bit of water and dipped his toes in, walking around for a bit. Afterwards, we head back to the car.
Oddly enough, the GPS speedometer couldn’t get a clear signal. We drove for roughly a half mile before the speedometer started working. With a clear sky, this is a bit concerning. I may have to move the antenna to the outside of the car.
Panoramic view of a little resting area by the Shenandoah river at Eastham park
Charge
Charging at Jack Evans Chevrolet
I had a goal this weekend to see if I could find and use the level 2 charger downtown. It is in a certified pre-owned Chevy dealership. On a Sunday in rural America, the place was fairly empty. I found the DC fast charger, but I didn’t see any compatible plug to charge the car.
I looked at a few photos and reviews and found that they have three separate charging stations scattered between two buildings. I found the one I needed with the J1772 plug was by the main entrance. I plugged in, heard a click, and saw that the CitiCar was charging away.
I decided to take a walk over to Main Street while the car was charging.
Confederate Monument Controversy
Controversial Confederate monument
I took a look at the Confederate monument in front of the court house. I saw it was on the ballot last week when I showed up to the registrars office for early voting in the presidential election. There is a vote to move it to another location. I hadn’t paid much attention to it before, or even knew of its existence. It appears that it isn’t of any specifically recognizable general.
I Want Candy
Store front on Main Street of I Want Candy in Front Royal, Virginia
I saw that a new shop was opening up on Main Street yesterday. The storefront is fairly unique compared to other buildings in Front Royal in that it has a curve to it that wraps around the corner. Teddy and I went in today to have a look around.
Pick your favorite candies and pay by the pound
They have a bunch of bins where you can pick a variety of candy and pay by the pound. I kept seeing different candy that I had long forgotten about when growing up. I had to stop myself and consider that I could leave some candy for next time.
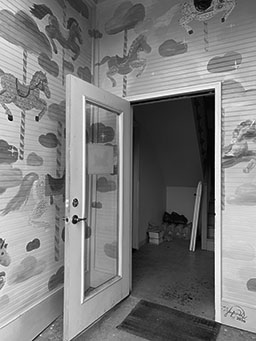
C&C Frozen Treats
Carousel horse themed entrance to C&C Frozen Treats
We went into C&C Frozen Treats next. There are many murals around Front Royal, and the owner of the shop had someone decorate their entry way with the carousel horse theme found inside their shop.
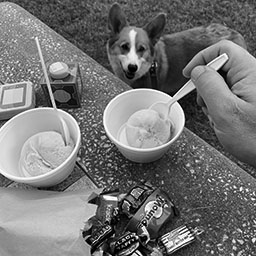
There were only two dairy-free flavors left, and the only one that was safe for Teddy was the spiced cake. I ordered a scope for both Teddy and myself.
Town Square
Dairy-free ice cream for two in the park
Teddy and I headed across the street to the town square. Teddy was looking up at me on the whole trip over to find a seat. He knew he was going to get a treat at any minute.
I poured out some of the candies on the checkerboard table and started having a meal fit for two kids at the ripe age of seven.
Teddy will do anything for a treat, and he put on a really good show for everyone watching. The comments I most often hear is how people wish their dog could do what he does. People are often surprised that he knows the difference between his right and left. One of my favorite tricks is to trop a spoon full of ice cream, and then look away and start eating. Teddy will keep focused on me until I say “release”.
Burger King
After having our desert, we headed back to the CitiCar. We were almost up to a full charge, so I decided we could continue our little joy ride and cruise on up to South Street. We were stuck in the Burger King drive-through for about twenty minutes. By time we got our food, I was ready for a change of scenery and eat somewhere else.
Burrell Brooks Park
The charge from the dealership gave us a lot of battery to run around town with. I decided that we could take the CitiCar to Burrell Brooks Park. I hadn’t taken it there before because it’s simply too far.
The park has a small walking path with fitness stations peppered along it. There is also a playground, music playground, and basket ball court. It looked like a Childs birthday party was going on at the pavilion. Teddy and I found a bench at the far end of the park away from everyone else. The meal was satisfying. I took Teddy on the path around the park before we started heading for home.
Fantasyland Park
It was starting to get into the twilight hours and I was debating if we should go home, or stop by Gertrude Miller Park. I didn’t’ have an accurate reading on the batteries state of charge, and I knew I could recharge at a pavilion. Along the way, I turned on the lights and after a brief moment, they went out.
A CitiCar parked at Fantasyland Park
I was debating if I should go strait home without any lights, since it wasn’t too dark out yet. I pulled off into the Advance Auto Parts parking lot and decided to play it safe rather than be sorry. I pulled out the voltage meter and looked for a 30 amp fuse. I already knew which fuse to check, and how many amps it should allow. After two minutes, we were back on our way.
Rather than stopping at Gertrude Miller or Lions Park, I decided to go for the parking lot in between the two parks. I parked the CitiCar under a large tree next to Fantasyland Park.
We didn’t stay long. I took Teddy over to Happy Creek and let him wade a bit in the water. We walked around for a little bit before hopping back into the car.
Back Again
Just as we were almost home, one of our neighbors walking their dog waved at us. I turned around and zipped on over. Although he was stuck in the car, Teddy and his friend were super excited to see each other. Although the car sounds fairly noisy to me, my neighbor commented that it sounded like someone on a bicycle. This revelation came as a bit of a shock to me.
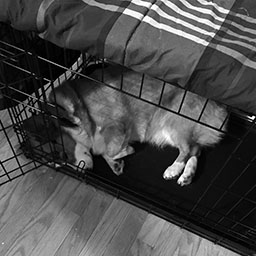
Teddy is exhausted from having too much fun
We said our good byes and I zipped back to the house and guided the CitiCar into the driveway. Teddy was a bit exhausted. We had been to one park after another, and a few stores the entire day. When I see him twitching in his sleep, I imagine he is having wild dreams chasing squirrels and rabbits through the woods.
In Other News
From the advice of other C-Car owners, I’m considering changing the button for Secret Hyperjets to be red.
A 12 volt charger arrived that works on both 120 and 240 volts AC power
I didn’t make any progress on the window this weekend…
Teddy and I headed over to Gertrude in the CitiCar late in the evening. It was getting into the twilight hours, and we had our lights on. Arriving back home and hooking up the charger, I noticed the cover for the contacts was fairly warm. I’m concerned that there is some arcing going on, or too many amps are passing through. It could also have something to do with the proximity of the new charger next to it.
Back to Front
I removed four of the 12 volt battery chargers in the back of the CitiCar as well as their quick disconnect plugs from the battery terminals. I moved the last 12v charger to be next to the accessory battery. I sat the Lester charger next to it as well. I got underneath the car and ran the charging wires from under the seat to the front of the car. While I was down there, I ran an extra set of wires to the front to hook up my battery meter.
Chargers moved to front of car along with a battery meter.
I no longer need to open up the seat to check the voltage. The Lester charger bumps the voltage so high that the volt meter no longer operates until the batteries stop charging. Unfortunately, the wires and chargers look like a giant rat nest.
High Current
The charging app had settings for the cable size at 12 gauge. I have a smaller 14 gauge wire from the battery to the terminal bus bar, but the app wouldn’t let me select a smaller size. To work around the problem, I added an extra 14 gauge wire to both the positive and negative busbar terminals.
Two 14 gauge wires are used to support the current of a 12 gauge wire
I’ve noticed that the wires for the power strip and the Lester charger tend to heat up. The Kill A Watt meter shows a 20% higher wattage being used than the charger is rated for. My goal is to wire up the outlet in the front of the CitiCar to a standard household outlet, and remove the power strip. I’ve also noticed a smell of spoiled eggs when charging. I keep leaving the garage door open just to feel like I’m doing something that might be safer.
I’ll need to wire up a J1772 inlet into the same line, but first I need to find a 12 volt charger that can sense if it is connected to 120 or 240 volts.
Interference
I saw a video on YouTube where someone was demonstrating the effect aluminum has on detecting GPS satellites. I moved the speedometer GPS sensor to another part of the car.
In other news
Rather than splitting out my biweekly deposit through weighted positions in my portfolio, I decided to throw it at Tesla. The companies stock usually does so well that my deposits usually go to everything else that is underweight unless I manually intervene. I feel like I’m playing catch up. It’s nice to finally see the number of shares rather than just the price going up for a change.
The Lester summit series II charger has been tucked into the back of the car. I talked with the Lester tech support and found that the default charging profile is fine for the batteries that I have, and that the “bubbling” is a very important part of the charging process. I also asked about the battery state of charge remaining at 100% after driving around. The response was that the SoC will not update until you connect to AC power. I don’t like the idea of it reporting outdated SoC information, but sure enough, it updated once I plugged the charger in.
I broke my previous record, pushing the limit to 11.1 miles on one charge. The speed at which the Lester charger can replenish the batteries is phenomenal. It was charging at 3.11 miles per hour compared. This is four times faster than the average 0.8 mph charging rate. The watt per hour has come down 25% from the first charge on the Lester, but it’s still a bit high.
The increased recharge rate is giving new life into the car. I really want to get the new lithium batteries installed. I took a second trip today just because I could. I’ve driven 16.3 miles in the CitiCar today.
I went ahead and soldered wires to one of the replacement buttons I got for the GPS speedometer. I removed the broken one, wired everything together, and confirmed that it now resets the odometer. I no longer need to bend over and ground a loose wire on the cigarette adapter to reset it.
Odometer button labeled as Secret Hyperjets
Just for extra fun, I used my Dynmo 1550 tapewriter. I labeled it “Secret Hyperjets”, a reference to the Spaceballs Eagle 5 going into hyperactive. I’m not bold enough to claim that my CitiCar has a plaid mode.
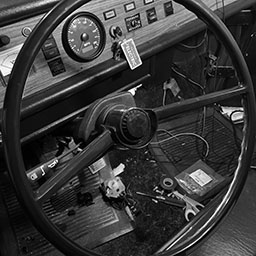
I also spent a little bit more time aligning the steering wheel again.
I suspected the last time I went to the charger, it stopped supplying power because I may have turned off the power strip. It was time to give it another go.
Five battery chargers for 12v car batteries in the back of a CitiCar
I moved the battery chargers into the back of the CitiCar. I zip tied wires going to the outlets, and made sure I could see them all face up. Everything is setup for a quick change between J1772 charging, and charging from a standard house outlet.
Teddy and I hopped into the CitiCar and took off for the charging station. Driving around with the new turn signal switch, things felt much simpler. Who would have imagined how much luxury a fully operational turn signal switch would add to a car?
The thing that got to me was that after all of the care I went through to align the steering wheel correctly yesterday, it still wasn’t aligned. I couldn’t wrap my hands at the 10 and 2 positions, and my mind kept wanting to level it off. The car pulls to the side when hitting the breaks, making the problem worse.
Misaligned steering wheel
Just like the last time, we saw the red Tesla and parked next to it. I connected to the charging station and confirmed everything had power before we headed over to Checkers for some lunch.
After picking up our food, Teddy and I sat on the grass in the shade of a tree. It was a great day. Nice weather, light breeze, with sounds of people and nature in the background.
The CitiCar was still charging afterwards, which confirmed my guess as to why the charger stopped supplying power the last time. It wasn’t due to a low power draw – but rather, I bumped the power strip to the off position.
I proceeded to take Teddy for a little walk. When we headed back to the car, the Kill A Watt meter showed that we got 0.2 kWh in 47 minutes. That is almost a mile added to the car. I now have a baseline to improve charging speed.
We drove over to Lowe’s and picked up some stud fasteners as a possible solution to bolt our switches and the motor controller into the car.
When I got home, I made sure the car was driving in a strait direction. I took a look at the steering wheel. I found an easier way to remove the cap without any tools. Once I took off the wheel, I rotated a plastic ring on the switch to line up with the steering wheels bolt, and placed the wheel back onto the steering column in the correct position.
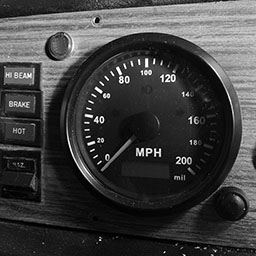
Speedometer
The speedometer that I installed in the CitiCar came with a button to switch between the trip and lifetime odometer. I hadn’t installed the button yet. Instead, I’ve been resetting the trip odometer by grounding the end of the external button wire with the edge of the cigarette lighter. It looks like I’m trying to hot-wire the car when I bend down to grab the wire and line it up.
Grounding out speedometer external button wire on cigarette lighter
I decided it was time to make life simpler on myself and install the button that came with it.
Now that the charger is no longer bolted inside the car, I can stick my head in the area and look back up at the dashboard from behind. I was able to confirm that there weren’t any wires on the bottom right of the speedometer. I drilled out a 15/32″ hole, fairly slowly. The aluminum dashboard panel in the CitiCar is fairly thick.
The tricky part now was to connect the button up. The metal tabs are small. The spade connectors that I have are too large. My goal was to solder some wires onto the switch and put spade terminals on those wires.
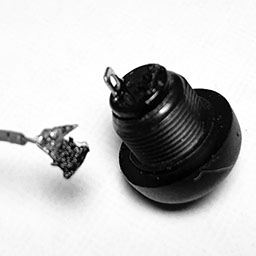
Terminal melted off of a plastic button
Not every goal is met. I’ve been out of my thin soldering wire for some time. The terminal melted off when I began to heat it up with the tip of my soldering iron. I looked at a few videos online and found that I should have threaded the wire through the hole first, then twist it tight, and proceed to heat up the wire instead.
I found the same exact 12mm waterproof momentary push button switch and ordered aa pack of 15 with five colors. I’ll be able to make 14 more mistakes before I order more.
For now, I plugged up the hole with the defunct button. I’ll continue to use the cigarette lighter to reset the trip odometer.
Manual speedometer gear housing for a CitiCar motor
On our lunchbreak, we started to take off in the CitiCar. There was an odor and a whining noise. It suddenly changed its pitch to be a bit more frantic. Since I removed the speedometer cable last night, I had a hunch that it was the speedometer gear housing that was still on the motor. It was probably a combination of spinning the metal shaft, the entire gear housing, or a combination of the two. After removing it, Teddy and I were zipping off to the park without any more whining.
We were followed into the park and asked about the car. A brief conversation ensured before Teddy interrupted with “Nature’s Call”. After our little walk, we then got custard where someone chimed that they had a Tesla, and thought a CitiCar wouldn’t be useful in Miami, Florida. After learning that the cars were manufactured in Florida, they clarified that they couldn’t use it on the highways.
I was able to clock in a new record at 10.3 miles on the trip odometer as we arrived back home.
High Beams
My high beams continue to turn on while driving, and sometimes on their own while parked. One of the C-Car owners shared an image of a turn signal switch that might be compatible. I found an imported after-market turn signal switch for a Triumph Spitfire 1977-1980.
CitiCar stock Lucas UK turn signal switch vs aftermarket Triumph Spitfire 1977-1980 turn signal switch
I was able to take off the steering wheel cap using a wrench. The nut underneath was not tight at all. I suspect I was following in the prior owners footsteps. The steering wheel lifted off without any effort. The turn signal switch had a screw underneath that kept it secure to the steering wheel column. After loosening the screw, the switch lifted up most of the way, but was held back by the wires. I was able to have enough room to slide it off of the steering wheel spline.
A piece of plastic that broke off of the high-beam switch
The switch was missing a piece of plastic that was later found setting inside the steering wheel columns cover. The original CitiCar turn signal switch could not be repaired.
Spade connectors crimped to turn signal switch wires
I cut it free of its wires and matched them up to the new signals wires. The new switch had separate wires for the high beams, and the flash. I was able to join the two wires so that they both operated the high beams.
Once the wires were connected, I discovered that the high beams would no longer work unless the regular lights were on. I’m used to the high beams always coming on regardless if the lights are on, so it feels a little odd.
When assembling the steering wheel, I paid close attention to the self-canceling signals. This has been a problem that I’ve had in the past where the signals don’t seem cancel – or at least, not always. Now they do. I believe the prior owner didn’t pay attention to the correct orientation when putting the wheel back on the steering column. When placed upside down, you would have to turn further left/right before the signal could be canceled. Merging into lanes without much turning of the wheel would have no chance of being canceled.
The CitiCar steering wheel with an after-market turn signal switch
In one sense, it almost feels like I have a new car. The turn signal was a constant problem where I would have to actively check often if the high beams came on, and verify that the signals switched off. I would previously go for a walk in the park and come back to see that my high beams came on, draining the battery.
Original steering wheel stalk vs after-market stalk with symbols
I really wish I could have fixed the original switch, or at least use its stalk on the new signal switch.
In Other News
The Tucson EV J1772 to Zero adapter arrived. It had the correct plug for my charger and my EVSE was able to communicate and supply power through it.
I got a phone call this morning that the part for my SUV didn’t arrive at the dealership. Saturday will be very busy, so it may not be repaired until Monday.
Now that I’m using a GPS speedometer, the existing speedometer cable is no longer needed. The cable was entering the floor next to where the new throttle was installed, and I was fairly concerned that it could get caught up on the arm. It also clears up the mess of wires behind the dashboard a bit.
Speedometer cable entering car through floor next to throttle pot box
There was a bunch of black rubbery caulk where it entered through the floor. Once the caulk was removed, I saw that the throttle I installed covered part of the opening. It was difficult with the room remaining – but after working with it, I was able to pull the end with the bolt out.
The next part was pulling the cable off of the underside of the car. It was threaded above the brake lines and emergency break. Once I got most of it pulled through and hanging out of the front of the car, the next step was to remove the other end.
I was able to unbolt the speedometer cable by reaching down into the battery compartment. It was a tight area trying to get a good grip with some pliers, but it was easier than pulling the bolt through the floor.
Speedometer cable zip tied to underside of CitiCar frame
I thought I was home free as the wire started sliding freely under the carriage until I hit a snag. It was in a tight spot that I couldn’t see. I got out my phone and looked around. A zip-tie was holding it against the frame. After confirming that no other wires were being held in place, I jacked up the car enough that I could reach up with some tin-snips and cut the zip tie.
The cable is fairly sturdy and doesn’t like bending much. It was holding its shape pretty well after being removed from the car. Each end has a metal shaft that spins to indicate how fast the motor is spinning. It may seem like a simple task, but its another step forward. Progress.
In other news
I took my SUV into a car dealership. I’ve had two people “fix” it already, and it feels like I’m losing money on temporary fixes. The professionals took a look at it. Although only a fastener on the transmission was broken, I was told that the shifter cable needed to be replaced as well since it’s more of a combination of the cable and fastener.
The parts will be in tomorrow morning. I had the option to bring it home, but I was told that the vehicle broke again as they parked it. I felt lucky that I was able to get it to the dealership, and wasn’t about to tempt fate again driving it home and back. The walk home was about three miles. I sense another long walk in my immediate future.
The walk home had me thinking of what options I may have to haul the CiitCar on a small trailer, that the CitiCar could haul on its own. It would have to be very lightweight and support the CitiCars weight. It would give me the option of hauling it to a destination where the towing vehicle can be dropped off. Both of my primary vehicles have a hitch. I would need to determine where I could install a hitch on the CitiCar.
Another thing to look into is if the trailer could serve as some kind of car jack that would make it easier for me to get underneath of the car to make upgrades and repairs. Of course, I would have to stabilize the trailer – but it would seam to be a safer way to jack it up, and to a higher level.
Before leaving the house today, I took the garage opener out of my car and put it into the CitiCar since that’s the only vehicle I park in the garage now, and it saves brakes and battery by avoiding a trip of walking into the house to close the door once I exit the garage.
I was ready to go, but nothing happened when pressing the accelerator. The contactor was engaged. I tried engaging/disengaging the parking break. The shift switch was in reverse. I looked at the wires that I fixed yesterday and everything was connected. I then realized that I hadn’t attached the throttle rod back onto the cam when I was installing the pot box throttle. Reattaching the rod, I was ready to go.
I was feeling even more emboldened today after making it to the dog park yesterday in the CitiCar. I even decided to take the steeper hill out of the subdivision, but soon realized it wasn’t as steep as I had thought, and it was shorter. I’ll be taking that “short cut” out of the subdivision more often now. I decided to put the car to the limit and drive the loop to Mc Donald’s and back.
Public Charging
We took a stop at Gertrude park along the way, parking close to the entrance this time to reduce the power consumption. I’m often parking closer to entrances and walking further to consume less energy.
I saw someone had plugged in their laptop the other day at one of the pavilions. Just before we left, I decided to give it a go and charge up. We were already at 80% charge, so the charge would have been fairly slow in the absorption/equalization stage.
Teddy and I sat by Happy Creek for a little while. He would wade around, drink some water, and just lay down enjoying the light breeze and watching people. I walked over and read the Kill A Watt meter. We only consumed 0.2¢ – about 1/15th of a mile added.
Mc Donald’s
We took off and zipped along, coasting when we could, avoiding the use of brakes, and using gravity and the lack of traffic to our advantage.
A CitiCar parked in the shade at Mc Donald’s on a warm sunny day
The drive-through at Mc Donald’s was so long that there was barely enough space for the CitiCar to queue at the end without blocking traffic. After picking up our food, we were able to make a sharp enough turn into the parking lot without having to loop around the building like most people and avoided waiting for an opening going through the drive-through line.
The ride home was the same as usual. No one was behind us for the most part, so we were able to coast often. We took the longer hill back home since it doesn’t have a stop sign at the bottom of the hill, and I have a goal of coasting home without pressing the throttle once I start going down. I haven’t made it yet, but I’ve come very close.
Odometer Readings
At the end, I looked at the odometer and saw that the trip was only 8.5 miles. A previous trip this way registered as 9.5 miles on the old (inaccurate) speedometer, and that didn’t include the stop at Gertrude and the additional length of a full loop rather than back-tracking via the shortest path. Mapping out the trips on Google maps, the GPS speedometer is under-reporting by 0.3 miles while the original speedometer was over-reporting by 0.9 miles.
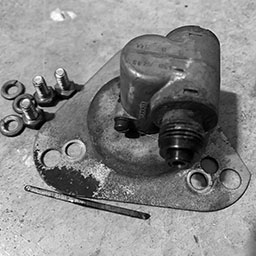
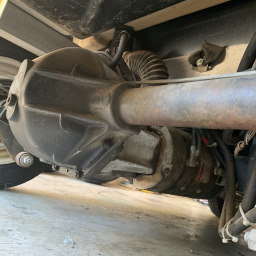
I’ve been talking with a few people in CitiCar and Comuta-Car groups and to someone at D&D Motor Systems to replace the motor that I’ve got. The model numbers of the motor and axle that I have do not provide enough information alone.
Dana spider axle and motor on a CitiCarv
For anyone going down the same route, here are the numbers that I see, that you can use for reference. The motor has some details on its plate, but some of the details are worn. I am unable to see the serial number at the moment:
GE 6HP Series Wound 48v DC motor plate
Manufacturer
General Electric
Voltage
48V
Wound
Series
Horse Power
6
RPM
4000
Amps
125
Class
F
Time Rating
INT
Model
5BC 49 JB 327 C
Motor plate information
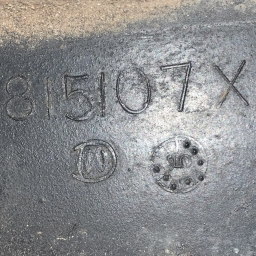
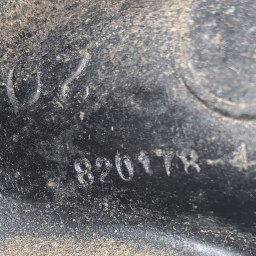
Numbers 815107X and 5 on a Dana Axle
Numbers 20 and 820178-4 on Dana Axle
Numbers 820178-4, 5, and 20 appear on the axle. Another number appears as 815107X, but it may also be 8/5/07X or 8/5107X or 8/5107X.
The number five appears in the center of a circle, tilted on its side, with eight dots around it in odd positions filling eight of ten spaces.
There is also a letter “D” with a letter “W” inside of it.
I need to pull the motor off of the Dana spider axle to see inside and identify the motor coupler, spline, or shaft it will need. I’m not at all a car guy, but that’s the lingo I keep hearing. I’ll just pull it off, snap a few pictures, count things, and make some measurements with my calipers. How hard can it be? After all, I’ve watched David Brunson install a motor on his Comuta Car, so I’m certain that I am an expert mechanic now.
I wasn’t sure if removing the motor involved axle oil spilling out. I was told no, but then a few people chimed in and started offering tips on how to replace the axle geese. I figured while I’m working in that area on a 40 year old car, what bad could come from fixing something that ain’t broke? It felt like general maintenance that should be done every X-thousand miles or X-years, whichever came first. Sure enough, the owners manual had something to say about it:
The 1976½ CitiCar Owners Manual
SIX MONTHS AFTER PURCHASE AND EVERY SIX MONTHS THEREAFTER
Check differential fluid level. Use 90 weight Hypoid gear oil. Fill to top. In cold weather lighter weight fluid may be used. It is not advisable to mix different weights. When changing types of oil, flush system. Use no lighter than 30 weight oil.
I’m under the impression that the “every six months” is just topping off what’s already there, but this thing is so old, I’m wondering what I’ll find inside. I think I can just drain the fluid and fill it back in. If I need to crack it open, I’ll have everything on hand, just in case.
I previously had no clue what a differential was, but apparently it is something inside the rear axle. I watched a video by CitiCar Tom rebuilding his Terrell differential for a different axle than mine. I watched another about replacing differential fluid and ordered everything I didn’t already have, and got a nice 20% discount.
Supplies
Part #
Price
Discount
Mobil 1 Synthetic Gear Lubricant LS 75W-90, 1 Quart
26101
$13.99
$2.80
Permatex Ultra Black Maximum Oil Resistance RTV Silicone Gasket Maker (3.35 oz)
82180/82150
$8.49
$1.70
Performance Tool Multi Use Pump
W1145
$16.99
$3.40
CRC Brakleen® Break Parts Cleaner Non-Chlorinated (14 wt. oz.)
5088
$3.59
$0.72
FloTool Standard Duty 7 Quart Drain Pan
OP-112EMI
$3.49
$0.70
TEQ Correct 2 Ton Hydraulic Trolley Jack
TQ924
$41.99
$8.39
$88.54
$17.71
Order from Advance Auto Parts
DC to DC
Buck converter and 12v socket
The other night, I had a few supplies come in. One was a DC-DC Buck converter from 24/36/48v to 12v. I was hoping I could hook it up so that it would work in both the 48 and 24v mode that the car runs in.
I had two sets of wired 12v sockets. I cut one of them in half and spliced the buck converter into the middle. I ran down to the car, hooked everything up and saw/heard an unexpected spark as the wire made contact. Nothing blew up.
I also got one of the cheapest 12v car devices I could find that was still a little useful, but I wouldn’t mind having it blow up if something I did would destroy it. I found a volt meter with 2 usb ports. I plugged it in and it showed 12.7 volts. Everything worked in both the 24 and 48 volt configuration.
Given that I saw the spark, I knew this would always be on, even when nothing was plugged into it. I went ahead and placed an order for a fancy latching switch button that lights up when the power is on. It comes with a pre-wired socket, and I believe I can setup the LED to run off of the 12v supply while the 48v power only flows through the switch itself.
In the mean time, I installed the other socket onto my accessory battery.
Dual USB Car Charger 4.8A Output Cigarette Lighter Voltage Meter
$9.99
19mm 3/4″ Metal Latching Pushbutton Switch 12V Power Symbol LED
$9.99
GPS Speedometer
The T600 has connected to Skynet
I purchased a little T600 Universal GPS Smart HUD. This thing is more of a curiosity to play around with, but I got it because I needed a battery monitor, and I like some of the features it came with.
This thing feels and looks cheap. It simply gives you the bare bones of features it advertises. The most fancy display has a round swoosh below your current speed.
I had to configure it first to bring the speed adjustments down to 100% and offset to 0 mph. I also played around with the three colors that it shows text in.
Speed
Speed Alarm
Distance
Voltage
Voltage Alarm
Duration
Cardinal Direction
Altitude
Clock
The features I like of the T600 Universal GPS Smart HUD
Leaving Home
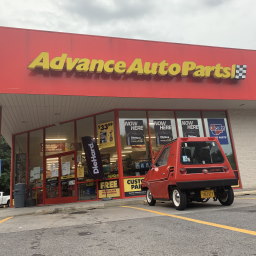
CitiCar at Advance Auto Parts
Teddy and I started our trip to pickup some supplies to change the cars axle oil, and to pull the motor off to take a closer look at the spline for the shaft of a new motor. As we pulled into the parking lot, there was a police car strait in front of us. Sometimes I think they are going to make up an excuse to pull me over just so they can have a closer look.
Teddy waits to take off on another ride
We wern’t at the store for too long, as it was an online order for pickup. It started to rain a little when we took off. I took Teddy over to Gertrude Miller community park on the way home. It got really dark, windy, and rainy very quick. I started wondering if the wind was strong enough to blow the car over.
Our first trip in the rain
The trip home was… interesting. The roads were wet. The rain was pretty hard. I had the wiper running along with the lights. I saw my voltage on the accessory battery was down to 12.0v. I even tried the defroster to see if I could defog the window. When I turned on the fan, I didn’t feel any air coming through the window vents. The simple fix was to use my hand to wipe down the window. I’ll have to look into what I can do to defog the windows later.
Dead after arrival
As we pulled into the garage, I turned off the lights. Since I was playing with the GPS HUD, I flipped the switch for the lights back on and see how much they impact the accessory battery.
Nothing.
I suspected that a fuse had blown. I grabbed my multi-meter and tested all seven for continuity. I found the bad apple. When I matched the position up to the cover plate, it was labeled as a fuse for the break, turn signal, and horn. I turned on my turn signal and it worked. I pulled out the fuse… still works. I’ll need to re-label these fuses later. Even if I was reading the panel upside down, the other label indicated it would have been the controller.
Luckily for me, one of my first investments in the car was to purchase a variety of fuses and throw them in the back of my car. The cover plate indicated a 20 amp fuse would be adequate for the lights. I replaced the fuse, and all was well with the world.
I took a look at the burnt out fuse and noticed it was rated for 30 amps! My speculation is that the previous owner put that in there because they got tired of replacing 20 amp fuses. Since this happened at the tail end of the trip, I’m guessing that the wiper motor had too much trouble as I entered the garage. Since it wiped away all of the rain, there was a great deal of friction to continue.
In the meantime, I have a DC fuse block on order with sticky labels and LED’s that light up when a fuse is blown. I’ll add the lights and windshield motor to my list of things to upgrade later.
Accuracy
Regarding the GPS HUD, there were a few things enlightening about it. The speedometer on the car was reporting 4 miles faster than what I was actually traveling at. I was able to set my phone next to the GPS monitor and confirm its accuracy. I thought I was going amazingly fast the other day pushing the car to 33.5 mph, only to realize now that I was going under 30.
On a related note is that the distance I have driven on the odometer is much higher than this new gadget is reporting. There seems to be a large discrepancy in just a few short miles. When I punch my routes into Google Maps, It’s sitting in the middle of the other two.
Waypoint
Odometer
Distance
T600
Google
Home
1,088.9
Advanced Auto Parts
1,093.0
4.1
3.5
3.7
Gertrude Miller Park
1,094.2
1.2
1.0
1.1
Home
1,097.4
3.2
2.8
3.0
Total
8.5
6.3
7.8
With the battery voltage meter, I felt better to see how the lights and a wiper affected the voltage with a general idea of the batteries health. I would still prefer to see a capacity meter of some kind with a percent, colors of red/yellow/green, and a bar showing how much is left.
I used the altitude feature to get an idea about how high the hill is to get out of my little neighborhood. The top of the hill is at 648 feet above sea level, and the lowest point is at 508 feet. Every time I go on a little trip, I’m starting out with a 140 foot tall hill.
I know it’s super cheap, but here are some other things I wish it had
A separate set of leads to connect to your battery – monitor 48v battery voltage while connected to a dc-to-dc 12v converter
A switch to turn it on
Buttons on the front
Better sticky pad. It keeps pulling up from the dash