Tag Archives: Battery

Fully Charged

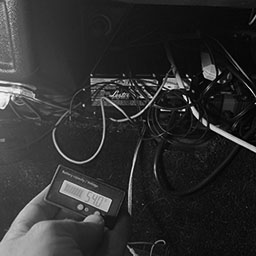
It’s been a full week since I had initially charged the CitiCar lithium batteries with an inverter connected to the old lead acid batteries. The lead acid batteries were drained just below 12 volts after three hours of charge.

After charging the CitiCar, the lead acid battery bank took a week to recover

After seven days of charging, the battery bank has been restored to being fully charged. The 200 watts of solar panels were not even producing 60 watts at peak sunlight in the middle of winter.

solar panel watts produced while the battery was recovering

The batteries were not recovering much during the day. After a couple days, I added a 4 amp car battery charger/maintainer to continue the charge during the night, rainy days, and when there wasn’t much power from the sun.

At this moment, I’m not fully running on the power of the sun. Even though I may have a large battery bank, it’s problematic if it takes a few days to recover on the sun alone. My goal is to get this battery bank to charge with one day of sun power. I’m under the impression that would need to capture around 3.6 kWh in one day.

Calculation of sunshine hours near my home

I found a Casio online calculator that gave me an idea of having roughly seven sunshine hours this time of year in my location. I would need panels that produce an average of 514 watts throughout the day. The actual wattage of solar panels needed to produce 500 watts at this time of year feels like 2 or 3 kilowatts when looking at my amorphous panels only producing a quarter of what they are rated for, and in a much smaller window than seven hours.

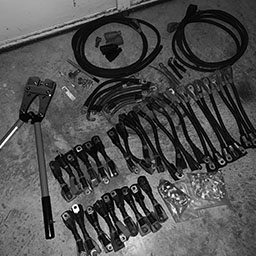
I ordered 500 watts of polycrystalline panels along with another charge controller. I’ll need to look into having a small shed setup in the back yard to mount the panels to the roof.

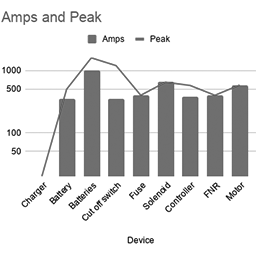
From what I understand, you shouldn’t mix and match solar panels wired up to your charge controller. However, you can hook up multiple charge controllers to the same battery bank – and you don’t need to wire them up to talk to each other either. I’ll be experimenting with this to make use of the 700 watts I’ll have in total.

Temperature Tantrum

Still puzzled over the noise with the temperature probe, I started doing a bit more reading and experimenting.

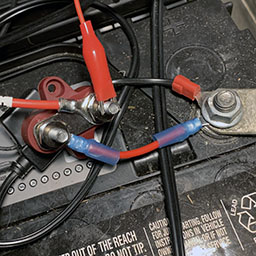
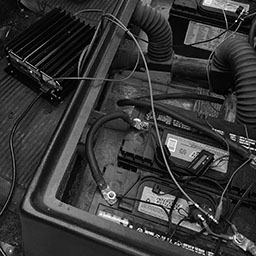
I was trying to figure out if there was a specific area a temperature probe should be. I had assumed to put it in the center of the battery bank, dangling halfway above the floor and the top of the battery. I found an exchange of messages on one forum where someone replied that it should be in the center of mass. I also found an article describing that most battery temperature probes are under the battery where the battery heats up the most. I decided to prop the batteries up a little and stick the probe underneath. This helped, but only a little.

I started looking into ways to shield the cable. I put some extra non-conductive toolbox liner under the probe and its wires. This had a significant impact. It was still noisy, so I tried adding another layer under the wires. I had even more success. Next I tried covering the wires from the top as well, but I couldn’t see any significant impact.

Timeline of changes made to reduce noise on temperature readings

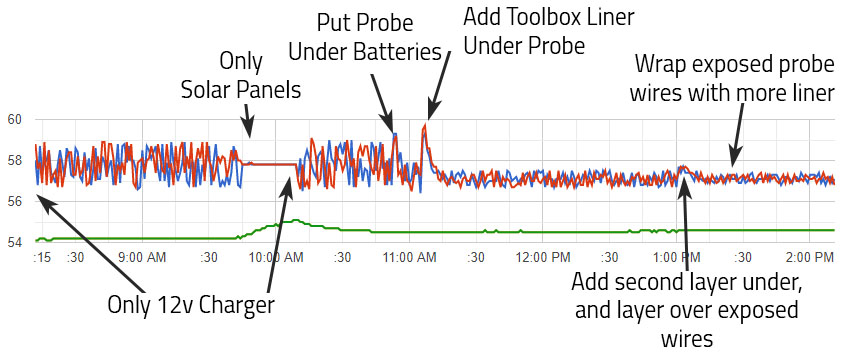
I noticed that the battery charger dropped it’s voltage this afternoon, and is reporting that the battery bank is now fully charged. The chart for voltage is now showing a range of 0.2 instead of 2 volts. This in turn, magnified some “noise” on the voltage chart as well.

Probing

Sign wave from a harbor freight Viking 12 volt 4 amp high frequency battery charger / maintainer

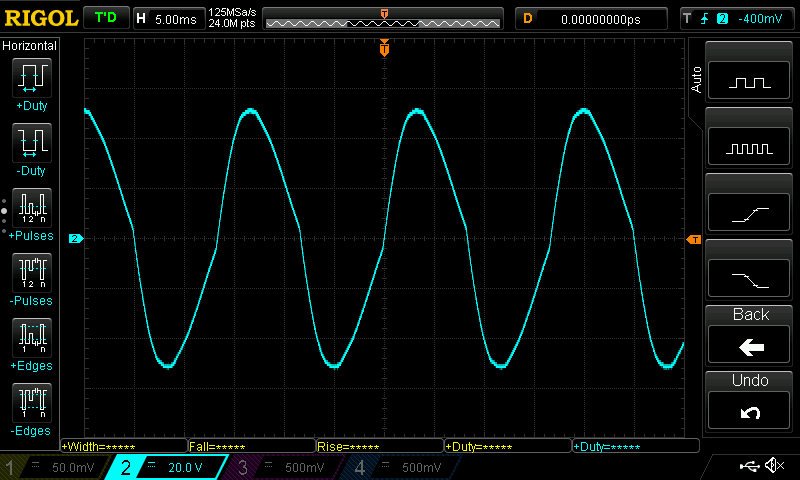
I decided to take a deeper look with the oscilloscope. Probing the most positive battery terminal, I saw a pure sign wave. Probing the positive screw terminal of the temperature sensor revealed the same sign wave. The sign wave went away when the charger was unplugged.

I had my answer. There was simply nothing I could do about it other than to stop using the charger if I wanted a clean reading. Looking at the charger itself, It’s actually labeled rite there below the voltage reading:

High frequency battery charger/maintainer

Conclusion

Although it appears as if I have noise on the line, it’s actually a high frequency sign wave of voltage supplied by the charge controller. Since I’m reading the temperature from the charge controller only once a minute, it will seemingly give a random value between the sign waves highest and lowest peak.

What really stumped me was that two temperatures are always the same – Battery and Remote Battery. When the charger is on, they have different values. This tells me that the frequency is so high that the charge controller itself is requesting these two values from the probe, and that the voltage dropped/raised so quickly that the second check (microseconds later) is out of sync.

Advertisement

Powertrain Upgrade

Quite a bit has happened since the last post where the majority of my nights and weekends were focused on the CitiCar, and a bit exhausted by time I’m done for the day. The videos were still being posted, but I just didn’t have the mental willpower to write up a detailed account of what was done. here is a brief summary of the last two weeks.

Battery cables

2015 Chevy Volt lithium batteries and charger installed into car and connected in parallel with cables from an old EV and a few battery cables that I made myself from materials provided by a local CitiCar enthusiast.

Battery terminal side-brackets installed.

CitiCar battery cables

Main Fuse & Switch

Installed an ANL fuse box to hold the 400 amp ANN fuse. “Sculpted” the cover to make it fit over the thick 2/0 cables and lugs connected to it.

Installed a heavy duty switch to disconnect the power that could handle the large number of amps that the motor will draw from the batteries. Purchased some screws at the hardware store to mount the switch.

Continuing to add cables along the path from the positive battery terminal to a switch, fuse, contactor, etc. Cleaning battery acid from cable lugs donated from another EV.

Main Fuse & Switch

Fuse box mount

Created a backplate to mount a new 12 volt fuse block out of diamond plate aluminum, and mounted it into the car where the accessory battery had previously sat.

Wired up chargers charging wires. Zip-tied the extension cable going to the J1772 adapter along the cars frame. Ran 10 gauge wire to the front of the car, specifically to run the 12 volt DC-to-DC converter and to control the motor controller and contactors from the dashboard.

CitiCar Fuse Box Mount

Installing DC2DC

Wrapped power supply cable to the front of the car with split tubing to protect it.

Installed a 20 amp 12 volt power supply in the CitiCar to convert the batteries 48v power supply to 12v. At most, it can handle 240 watts.

Added a LED light strip with a switch.

Installing DC2DC

Powered Dashboard

Connect the dashboard to the 12v fuse block. Wire up the frame to the 12v negative. The cabin light is unable to get power. The original contactors are still activating.

Powered Dashboard

Wires and Switches

Painting battery cables red. Starting to prepare other cables to paint.

Comparing two separate motor reversing SW202 style switches. Changing from 12v coils to 48v coils to simplify wiring and reduce the need for relays.

Change the old 120v charger cable into an extension cord by adding a NEMA 5-20R receptacle socket. Added a second charging cable plug to the car so that the batteries can be charged via J1772 in the back, or 120v on the side by changing which cord is plugged into the back of the charger.

Wires and Switches

Painting Battery Cables

Painting battery cables with Plasti Dip to indicate how they are connected to the batteries. Added heat shrink where it was missing. Cut off rubber terminal covers. Wrapped up terminal ends with painters tape.

  • Red – Positive, and motor A1
  • Black – Negative, and motor A2
  • White – Motor Negative
  • Blue – Motor S1
  • Green – Motor S2

Painting battery covers.

Paintiing Battery Cables

Plasti Dip Battery Modules

Continuing painting battery cables and the battery covers on the 2015 Chevy Volt battery modules. Problems with using painting tape to paint two colors of Plasti Dip, as well as an unexpected early morning rain getting things wet. Cleaning up and painting battery modules blue for a more appealing look. Finish painting the battery cables.

Plastic Dip Battery Modules

Finish Battery & Cables Paint

Finish painting the battery volt modules and peel off the painters tape. Clean and neutralize battery acid on battery cable lugs.

Clean and neutralize acid on passenger side battery box floor. Start laying down thermal layer and toolbox liner.

Improve technique to peel painters tape from wet Plasti Dip to have nice hard edges.

Added some corrasion/oxidizing protector to battery cable lugs and battery box floor.

Finish Battery & Cables Paint

Battery Box Liner

Line the battery compartment of the CitiCar with toolbox liner. The liner is preferred because it is non-conductive. The frame of the car is conductive and wired to the battery negative, so this helps prevent a short in case a battery positive wire accidentally touches the frame. The thermal barrier may help with battery temperatures and a little extra padding for bumpy rides.

Drivers side was neutralized. Corrosion protector was removed, as it left an oily residue and wouldn’t be suitable for applying adhesives to keep the toolbox liner attached.

Battery Box Liner

High Voltage Stickers

Created some battery labels to warn about high voltage, and to provide details about the batteries.

Creating High Voltage Stickers

Drivers Side Batteries Installed

Re-installing the drivers side painted batteries, main switch, and fuse after lining the battery box with toolbox liner.

Drivers Side Batteries Installed

Battery Terminal Caps

Cut motor mounting brackets down further with new diamond cutting wheels. More battery cables were installed. Created caps to protect exposed terminals from moldable plastic that melts in warm water. Installed shunt in a different position for easier access to plug in wires.

Battery Terminal Caps

Powertrain Test

Wired up the motor and motor reversing switch. Setup switch and diodes on the front of the car to activate the contactors and let the motor controller know if the vehicle is moving in reverse.

Powertrain Test

CitiCar Runs Again

Troubleshoot contactor activation. Reverse direction of Forward/Reverse diodes. Got the wheels to spin (and in the correct direction). Go on a test drive.

CitiCar Runs Again

Alltrax Troubleshooting

Configure motor controller to accelerate faster, adjust voltage limits, and provide more amps to the motor. Since the motor was just replaced, I topped off the differential fluid. The speedometer wasn’t turning on, so I replaced it with a spare that I had laying around. Drove into town and ran into problems on the way back home with a burnt fuse and a disconnected high-pedal switch on the throttle.

Alltrax Troubleshooting

Motor Wires

Most of yesterday and the entire day today was full of rain. I wasn’t able to get much done compared to Saturday. Most of the day has been spent planning, researching, and cleaning the garage.

Alltrax Wiring

I’m working in a tight space with the motor controller, contactor, and motor. It’s difficult to bend thick cables, and harder to work with thick terminals overlapping each other.

I was in a tough spot with trying to get two wires connecting to the motor controller, and I was wondering if it was important that the wire from the motor goes to the controller, rather than directly to the contactor. Electrically, it didn’t seem to make much of a difference.

Alternative wiring proposal

C-Car and one DIY EV conversion owner said their controllers were wired up in this way. I sent an email out out the manufacturer.

Wiring Question

Hello.

I have an SR-72500 Motor Controller.

I am installing this in a CitiCar, which was previously controlled by applying 3 different voltages to the motor.

I’m looking at the Generic Series /w SW202 Reverse wire schematic in the operators manual SR (page 22)

On all diagrams in the manual, I see:
1 wire going from the SW180 contactor to the motor controller B+ terminal
1 wire going from the motor controller B+ terminal to the series motor A1 terminal

I’m working in a tight space and it’s difficult to get two lugs onto the B+ terminal.

Can I have the wire to the motor come directly from the SW180 contactor? These are the changes I am proposing:

keep 1 wire going from the SW180 contactor to the motor controller B+ terminal (no change)
add 1 wire going from the SW180 contactor to the series motor A1 terminal
remove 1 wire going from the motor controller B+ terminal to the series motor A1 terminal

The Answer

Technically speaking it will work, electrically speaking you’re going to cause an issue doing that. If this was a low current system, like a stereo then this would be fine, but since we’re low voltage high current we have to know where current is at all times. So when you put the two wire connection on the solenoid it turns the motor and controller into two separate loads the moment the solenoid closes and both are fighting to get the current coming out. Motor is bigger, it gets the current, and the controller just watches things happen without doing its job.

If you wire it that way, it will operate though, it may just do some weird things randomly.

I was taken back a bit. I half expected a basic answer of something along the lines of – only wire it the way we say to do it. This person went into detail of “WHY” with a simplified explanation. It’s exactly the answer I needed. I actually feel like I learned something.

I posted the manufacturers response on the Facebook post for the other C-Car owners to learn about as well.

Motor Cables

Yesterday I was able to put some cables onto the motor, switches, and controller. I wired up the main contactor solenoid to the motor controller and a small switch as a safety measure to prevent the solenoid from being activated while working on it.

The main contactor was flipped to allow the cable to the controller to be made shorter. The suppression diode was too close to the metal mount for the SW202 switch, so I bent it into a new shape that actually made it a bit more ridged and let me get my hands down into the area much easier.

I also started to setup a couple relays to allow 12 volts to pass to either side of the SW202 switch based on if the car is going in forward or reverse. While I was at it, I started labeling the wires so it would be easier to figure out how to connect everything up once I started running wires from the dashboard.

Cables installed allowing power to transfer between the main contactor, motor controller, motor reversing switch, and the motor.

Search for Parts

I found that out of 10 colors of automotive wire, I didn’t have pink. Pink is used to identify power for “reverse”. I went to a hardware, automotive, and farm supply store and couldn’t find the following:

  • Pink automotive wire
  • Relay with a 12v coil to pass 48v over the switch (actually, I couldn’t find any relays)
  • Battery side wall terminal

I’ve never really looked around an automotive store in the past. Usually I order something online and go to pick it up. I was shocked at how little the store seemed to have.

Gutting Old Parts

I pulled out the 48 volt and 12 volt battery chargers. I started removing all of the loose wires inside the battery compartment under the seat. I’ve got three of the original wires unthreaded from most of the zip ties leading to the front of the car. I was starting to run into a difficult time in the front part of the car.

The vent from the motor to the flap has been removed. I need to determine how to heat and defrost the car now that the motor can not support it.

Lithium Ion

Four battery modules from a 2015
Chevy Volt can fit into the CitiCar

I placed all four lithium battery modules in the car and found that I had enough room to place the battery charger under the seat as well. I’m considering the best placement while considering where the J-1772 inlet can be installed.

The battery modules had little nubs on the side that prevented them from sitting flush against the car. I cut them off and they now sit flush, giving an extra quarter inch to the space available beside them. I also noticed that the two newer chargers are missing the black cable that connects to the battery charger. I’ve been thinking about mounting some small angle brackets to the bottom of the battery box to prevent the modules from moving around while driving.

I’m still thinking about how to connect the four batteries. Each terminal is difficult to reach with the thick 2/0 wire terminals. I was considering adding a terminal fuse to each battery to have something to bolt onto for easier access. I also saw a copper butt seam flag connector as well that might work, letting me create two large wires rather than 10 smaller ones to connect them all together.

Body Repair

Although the body on the CitiCar has many cracks, it’s in excellent condition compared to its siblings. The ABS Plastic is susceptible to daily and seasonal temperature changes. The vibration of the car on the road and poor suspension makes it easier for the cracks to get out of control.

PlastiFix Kit and Super Prep

One of CiticarTom’s videos goes over repairing large cracks on the body of his CitiCar. He used PlastiFix and Super Prep. I was able to find the products and start my repairs.

I located just over 20 cracks. It took about an hour to go over the various cracks. I was finding even more as I went along.

It was a pretty sloppy job. Some cracks are difficult to apply the PlastiFix. Vertical cracks that are tapered up towards me are nearly impossible to fix inside the passenger door. I found that sometimes it was easier to smudge the plastic into the cracks with the gloves I was wearing.

Close-up of large crack in CitiCar door filled in with PlastiFix before sanding

I need to go back and fill a few more cracks that were found after cleaning up. I’ll also need to sand and cleanup the cracks that I fixed up today.

Repairing cracks in CitiCar ABS Plastic Body

Taco Day

Today was National Taco day. Teddy and I headed over to Riverton Commons and picked up a few crunchy tacos. Teddy hung out by the charging station while sharing a few tacos.

Teddy waits patiently for me to start charging the CitiCar
Wild flowers growing at the end of a road

We also had a walk around Rockland Park and Crooked Run Plaza. Teddy stopped by to check out some of the wild flowers.

It feels like every day is getting a little bit more chillier than the last. I took a look at my backyard garden to see what was left.

Marigolds blooming in my garden

The Marigold bush is blooming all over. I’ve planted over 200 seeds, and only one was able to survive to product flowers. I didn’t realize they were such late bloomers. I’ve got a few ideas for what I’ll do next year.

In Other News

Battery Monitor

My first order on AliExpress was for an AiLi Voltage/Current meter with a 350A shunt. I had ordered it over two months ago, and it has yet to leave Hangzhou, China. When I contacted the seller two weeks ago, they claimed that it had already been delivered.

I sent all of the shipping logs that I had as evidence for my refund request, including the screenshot the seller sent me – as it verified that the shipping company sent the package back to them. My order was refunded within a day.

I found the same product on Amazon for $10 more and it’s arriving tomorrow. It may be a 28% markup, but there is a guarantee that it is arriving.

AliExpress Opinion

Things are fairly cheap on AliExpress compared to Amazon. The main differences are time to ship, trust that you get what you think you paid for, and language barriers. You are often inundated with coupons, but they are for specific stores. Searching for a product may end up showing fifty different listings, pictures, and prices for the same product across different stores. It feels like an online flea market.

Radio Antenna

I noticed that the end of the antenna that slides into a radio had broken off and is just bare wire. I’m curious how to came off. I’ve been taking too long to move along on various projects.

Police Department

National Night Out is next Tuesday. After picking up lunch at Popeyes, Teddy and I headed over to the new Front Royal police department in our CitiCar to pick up a little “Thin Blue Line” flag and a 3 watt blue light. Afterwards, we headed over to Chimney Field park.

The Blue Line flag and a blue light

I need to pick up a little inverter so I can use my bedside lamp with my car to power the light during their cruise for the event. I tried to see how to affix the flag to the car, or just put the flag itself on the radio antenna, but I wasn’t having much luck.

Red Button

Trip odometer button

In the movie, Spaceballs, Barf switched the Eagle 5 to use Secret Hyperjets on the Eagle 5 to go into hyperactive. Men in Black had a hyperdrive on their car. Hyperdrive mode was activated by a red button that allows you to drive on the ceiling of a tunnel to bypass traffic.

With a recommendation from the C-Car owners group, I swapped out the trip odometer button for a red one. It’s already been catching peoples attention quicker.

Little red trip odometer button for secret hyperjets

Door Windows

I talked a bit with my neighbor regarding the various windows on the vehicle. He repairs automotive glass, but nothing like what the CitiCar has. He had some insight regarding the blue tint on most vehicles, having a company get measurements in case the back window breaks, and what could be done about the side windows.

I called up a company he recommended. Their first response was that they don’t do curved auto-glass. They seemed pleased that I am able to pop out the side windows and bring them in. I’ll take them over later in the week. Hopefully they can pop out the acrylic panels from the frames.

Sliding windows popped out of CitiCar doors

Contactor Mounting Bracket

Mounting bracket screws are too long

The wrong mounting hardware came with the Albright SW180 main contactor switch. The bolts were too long and could not tighten any further once they pressed against the solenoid. I found a bracket kit from Arc Components Limited located in West Yorkshire, England and had the parts imported.

Albright Bracket Kit Part No 2159-047

Main contactor switch secured onto Alltrax motor controller

The mounting hardware was perfect and looked fairly similar to the hardware used on the SW202 Forward/Reverse contactor switch.

Now that the contactor switch is secured, I can start modifying some steel brackets to affix the motor controller and FNR switches onto.

As a bonus, I got a little magnet from the company to put on my refrigerator.

Refrigerator magnet from Arc Components Limited, West Yorkshire, England

Lester Charger

I’ve been talking with tech support for the Lester Summit Series II charger regarding the egg smell, high voltage, large jump in SoC, and odd estimates being off by hours.

So far, things seem like it might be normal. Problems may be due to the age of the batteries, and that the batteries should wear in after a few charge cycles. I think the estimates being off by a factor of four may be due to the low number of amp hours the batteries have. The range that I have on the CitiCar also seems to be about a quarter of what it should have if it came with the proper batteries.

Here is the data from a charging cycle along with some visual graphs.

TimeEst MinAmpsAHVoltsSoCEstimatedActual
1:1383421.1050.615%13:5403:33
1:3082720.7651.516%13:4703:16
1:4681120.41252.218%13:3103:00
2:0279520.21752.820%13:1502:44
2:2077718.32353.422%12:5702:26
2:3775918.02854.323%12:3902:09
3:0936215.83757.373%06:0201:37
3:401829.04365.290%03:0201:06
3:541699.04565.891%02:4900:52
4:041599.04665.991%02:3900:42
4:3279.05066.193%00:0700:14
4:4600.05154.6100%00:0000:00
A high voltage applied to the 48v battery bank, and an odd 50% jump in SoC within a half hour
Graph indicating estimates are four times longer than actual charging time

Moving Chargers

Teddy and I headed over to Gertrude in the CitiCar late in the evening. It was getting into the twilight hours, and we had our lights on. Arriving back home and hooking up the charger, I noticed the cover for the contacts was fairly warm. I’m concerned that there is some arcing going on, or too many amps are passing through. It could also have something to do with the proximity of the new charger next to it.

Back to Front

I removed four of the 12 volt battery chargers in the back of the CitiCar as well as their quick disconnect plugs from the battery terminals. I moved the last 12v charger to be next to the accessory battery. I sat the Lester charger next to it as well. I got underneath the car and ran the charging wires from under the seat to the front of the car. While I was down there, I ran an extra set of wires to the front to hook up my battery meter.

Chargers moved to front of car along with a battery meter.

I no longer need to open up the seat to check the voltage. The Lester charger bumps the voltage so high that the volt meter no longer operates until the batteries stop charging. Unfortunately, the wires and chargers look like a giant rat nest.

High Current

The charging app had settings for the cable size at 12 gauge. I have a smaller 14 gauge wire from the battery to the terminal bus bar, but the app wouldn’t let me select a smaller size. To work around the problem, I added an extra 14 gauge wire to both the positive and negative busbar terminals.

Two 14 gauge wires are used to support the current of a 12 gauge wire

I’ve noticed that the wires for the power strip and the Lester charger tend to heat up. The Kill A Watt meter shows a 20% higher wattage being used than the charger is rated for. My goal is to wire up the outlet in the front of the CitiCar to a standard household outlet, and remove the power strip. I’ve also noticed a smell of spoiled eggs when charging. I keep leaving the garage door open just to feel like I’m doing something that might be safer.

I’ll need to wire up a J1772 inlet into the same line, but first I need to find a 12 volt charger that can sense if it is connected to 120 or 240 volts.

Interference

I saw a video on YouTube where someone was demonstrating the effect aluminum has on detecting GPS satellites. I moved the speedometer GPS sensor to another part of the car.

In other news

Rather than splitting out my biweekly deposit through weighted positions in my portfolio, I decided to throw it at Tesla. The companies stock usually does so well that my deposits usually go to everything else that is underweight unless I manually intervene. I feel like I’m playing catch up. It’s nice to finally see the number of shares rather than just the price going up for a change.

Vacation Day

Early Voting

“I Voted” sticker given out to voters at Front Royal, VA Registrars office after voting

Today is Tesla battery investor day. A vacation day was in order. A quick trip to the registrar for some early voting was followed with a relaxing vacation day with Teddy.

Happy Creek flows past a pavilion in Gertrude Miller community park

Gertrude, as with most trips, was first on our list of destinations. Teddy slowly made his way around the park. We hung out on the side of happy creek by the wooden overlook. Small fish were swimming about, and Teddy found an old mangled baseball in the creek.

Teddy sits behind the CitiCar at Kentucky Fried Chicken

We were soon on our way over to KFC. I made sure to ask for a cup holder since the CitiCar doesn’t have a place to hold drinks.

CitiCar parked in the shade of a tree

One of the great things about a CitiCar is that you can back into a space half-way, and have quite a bit of room to sit on the curb and lay out your meal on the ground behind the car. In Teddy’s case, I’m able to put a cup of water and some ice cubes on a lid that he can’t knock over and spill.

Teddy, with a little custard ice cream on his nose, is as happy as happy can be

The next stop was at B&L Custard. The owner asked us where our little red car was. I pointed, but a larger car was obstructing her view. Teddy had his usual “Pup Cup” and got a bit messy with it. I had a strawberry shortcake sundae in a waffle bowl.

CitiCar parked at Bowman Park in Front Royal, Virginia

Next on our little trip was a visit to Bowman park. It’s a small park that I rarely visit, and we hadn’t driven to the the park with the CitiCar yet. A few picnic tables and benches are scattered throughout about an acre of land on a gradual incline. The park has very old and thick trees. Acorns were falling fairly often, but I didn’t see any squirrels.

Sidewalk through Bowman Park in Front Royal, Virginia

Laying against a tree for awhile, I had started to lose track of time until the church bell rang at half past four. It was time to be on our way back home.

Lewie and Teddy laying against a large tree at Bowman Park in Front Royal, Virginia

New Charger

The Lester Summit Series II charger arrived while we were out on our little trip through town. I plugged the car into the regular battery chargers and started to look over the instructions for the new charger, attaching wires and screwing the cover on. Tesla Battery Investor Day started while I was going over the details and I had a live stream playing while I continued to work on the charger.

Busbar with wire that has large enough ring terminal to go around battery terminal

The ring terminals that came with the charger were too small for the battery terminals that came in the CitiCar. I created a pair of wires with ring terminals large enough to connect to the battery terminals and connected them to bus bar terminals. The charger powered up and I was able to connect to it via Bluetooth.

The Lester Summit Series II charger is wired up to four 12v batteries that powers the CitiCar motor

The default battery profile was for 22001. It wasn’t all that descriptive. I went to the battery profile selector, choose battery manufacturer as “Interstate”. After being unable to find my battery model number, the app told me to contact Lester Electrical by phone. The office was closed. I left a message with technical support.

The default profile seems like it would be okay…

I looked into what 22001 was about. The profile information said it was for a 48v flooded/wet lead-acid battery pack with a 20-hour rating of 225-260 Ah. I don’t know what effect amp hour capacity has on the charging process. I didn’t know what kind of Amp Hours my batteries had.

BrandInterstate
Model31-ECL
Reserve Capacity (RC)190 @ 25 amps
Guessing: 190 minutes / 60 minutes3.166 hours @ 25 amps
Guessing: 3.166 hours * 25 amps79.166 Amp Hours
Final Answer…79 Amp Hours

I decided to give the default setting a go. I immediately noticed a difference in the amount of watts used to charge the battery. When using the five individual battery chargers in the past, they used a combined wattage of about 333 watts. The charger was using 1165!

The CitiCar batteries were charging up fairly quickly. It was great being able to see the current state of charge, phase, and predicted time for the charging process to complete. With the other chargers, I would have been waiting 11 hours to recharge at a rate of 0.8 miles per hour,

Towards the end of the charging cycle, I noticed that the voltage was fairly high for charging batteries at 64.1 volts (16.0 volts per battery). In the past, my other chargers would only go up to 14.5 volts on an individual battery. I went to check on the car and it sounded like the batteries were boiling. I opened the garage door as a precautionary measure to ventilate. I didn’t smell anything, but I wanted to be safe. I reached out to other C-Car owners. One confirmed that they had this issue as well and were told the batteries were okay.

The last phase seemed to drop the estimate drastically, stating 13 minutes, but was off by almost two hours. I thought maybe the temperature drop outside was having an effect on the chargers thoughts on how much the voltage needed to increase as the weather got colder. At least I now know that my batteries can hold 50 amp hours.

TimeRemainingAmpsAHVoltsSoC
6:5272720.5151.929%
7:0353320.4452.360%
7:3450519.81453.963%
7:4449519.61754.664%
8:331919.02964.190%
9:06139.03464.792%
9:3539.03964.993%
9:3939.03964.893%
9:4729.04064.994%
10:55005054.4100%
A review of the first charge cycle

The end result was a charge that would normally take 11 hours was done in five and a half. I was charging at 1.63 miles per hour! Unfortunately it looks like the quick charge rate also increases the watt hours per mile. I’m often averaging around 280 watt hours, but the recharge from this trip was 391 watt hours per mile.

Due to the quick charge rate, I could potentially take two trips in the CitiCar per day. I could take off with Teddy to the dog park in the mornings and go for a second ride in the evenings.

One thing to consider is that the batteries were being charged for a little over an hour on the old chargers before switching over. I may have been able to shave an hour off of the charge time if they started out on this charger from the beginning. The results from the next trip may give a better baseline of what to expect in future charge times and costs.

Charging interface for Lister Charger Connect after the first charging cycle completed

I’m hoping that the over-charge voltage was a one-time conditioning of some kind. I don’t like the idea of degrading the batteries from overcharging. When looking at the logs, I suspect that this will happen every time. I’m hoping that it will consider the time from prior charges to improve the accuracy of estimated time remaining on a charge.

If everything works out well, and there is a profile for the Chevy Volt batteries, I’d like to use this charger for the lithium ion batteries as well since it has quite a lot of features through its app, and it also has extra wires to give it the ability to prevent the car from going anywhere when connected to AC power.

After the batteries were charged to 100%, the charger wasn’t registering any power on the Kill a watt meter at all. Not even a watt. It’s powered by the battery pack alone. The other chargers that I had would always draw about two watts each after the batteries were fully charged – adding to the overall cost of maintaining the battery pack that that I don’t record in my logs. They would also draw more power every now and then in the “float” phase to maintain the battery voltage over time.

In Other News

Battery investor day went well. I just wish I could get ahold of some of those new batteries for the CitiCar. It’s an interesting concept to use the batteries as structural support as part of the frame. The whole car frame of the CitiCar is already used as ground. I went ahead and put in an order for another $500 of TSLA shares in the morning.

The speedometer has trouble getting a GPS signal sometimes, resulting in unaccounted miles if I take off before it acquires its position. In addition, the speedometer does not report speed until it has a signal. The sky was clear today and I would be waiting for a minute or two waiting for the timer to catch the signal.

Two aught

I reached out for help regarding battery cables with other d-car owners and enthusiasts. Along with the advice that I got, one of the locals that I met in the CitiCars maiden voyage was willing to help out with supplies and tools leftover from his EV conversion project. Teddy and I hopped into our little car and zipped downtown to the town square.

We met up and with more understanding of the parts of an EV, I was able to have a more knowledgeable conversation this time and had a lot of questions to ask regarding his setup. learning a bit more about how the guy upgraded his pickup truck. I paid more attention to his setup and had my eye on his use of project boxes to keep things segregated, organized and protected. He had quite a bit of advice when I asked about wiring harnesses and thoughts regarding a themed car that could be easily reverted without damaging the body. His thoughts were to look into Plasti Dip and a brand for “Painless wiring” for quality cables/connections where cables are labeled and easy to install.

He had a large box of thick battery cables and two bags of battery lugs. The box was heavier than I had thought and caught me off guard for a moment. Along with the box of cables, I was able to borrow some wire cutters and a gigantic crimping tool. I opened the CitiCars back window and we stuck everything in with plenty of room to spare. Unfortunately, I forgot to grab the wire cutters…

Teddy grows some wings

Teddy and I enjoyed the park and took a stroll down main street. We went through Inklings, posed in front of a mural, and grabbed some ice cream from C & C Frozen Treats. Teddy had some mango while I ordered a quart of brownie ice cream.

Teddy, Lewie, and The Chez CitiCar

By time we left, it looked like a bunch of antique cars were arriving into the town square for a little car show. I had to bail before the rain came. I didn’t make it home in time, and the rain was coming down pretty hard. I kept the wiper on the lowest setting and didn’t run into any problems blowing a fuse this time.

Running 120 volt AC via J1772

The replacement Level 1 & 2 electric vehicle supply equipment (EVSE) arrived today. I verified that it was operational and setup the CitiCar to charge it’s batteries through a J1772 port. I don’t know if the folks at Sebring-Vanguard had ever imagined such a thing, but I am now able to recharge the car at a public charger. Here is the setup in order from the wall to my cars batteries in my little experiment:

  • 120 volt (5-15) outlet in wall
  • Level 1 & 2 EVSE (5-15 & 6-20)
  • EV Charger Power Converter (from J1772 to 120v & 240v)
  • Power strip
  • Five 12 volt battery chargers
  • Four deep cycle batteries for the motor and one small accessory battery
Displaying how I’m charging lead acid batteries with power supplied via J1772

I was loosing a tenth of an amp with the EVSE and power converter. To add more fun to the experiment, I decided to let the car charge to full capacity through the J1772 setup and see how much the total energy is affected.

Cable Inventory

Battery cables

Later in the night I started going through the battery cables I received to get an idea of what I had. The cables can be called either 00, double zero, 2/0 and pronounced as “two aught”.

I started taking inventory, measuring inches from the center hole of each lug.

LengthQuantityLengthQuantity
11
6710¾1
413¼1
213½1
7113¾4
1142
114¼4
114¾1
Cables with flat lugs at each end

Some cables also had a 90 degree lug at one end, but the shorter ones didn’t have a lug at all on the opposite end.

Missing LugTwo Lugs
5
4
312
12¾
13½
Cables where one end has a 90 degree lug

Two long cables were included that were 13 feet, eight inches, and another at fourteen feet, 11 inches. The longer cable didn’t have a lug on one of the ends.

There are quite a few good cables that I can use. The longer cables alone may be enough on their own. Many of the smaller pieces can be used for jumps between switches, fuses, controllers, and such.

Battery cable connected to two Chevy Volt battery modules

I found that I could barely use the 10¾” cable to connect two Chevy Volt battery modules next to each other. I have four cables that are 13¾, and four more at 14¼ that I could use with more slack between the batteries. It’s preferable to have a shorter length to reduce voltage drops. Although with the length of this circuit, the drop would already be fairly minimal.

Corroded lug
Wire brushed lug

I spent some time cleaning up one of the most corrosive lugs. I first tried to do it by hand with a wire brush with some progress. I then grabbed my angle grinder with a wire brush attachment and cleaned it up fast. I was finding that I was chasing some of the corrosion down under the heat shrink around the lug.

Things are coming along great. I have many cables that I can clean up and use once the motor arrives. I have the supplies necessary to make my own custom length of cables as well.

Tiny Radio

One of my tiny car radio modules came in the mail today. I actually ordered three different kinds because it was difficult to judge how big they were. This three dollar radio was originally just for a side project to stick on a repurposed 8-track tape. The idea was to give my 8-Track radio some modern features to play music from a blue tooth device as well as micro SD cards.

Bluetooth MP3/WMA decoder USB/Micro SD/Aux FM radio module

I was originally set on installing an 8-Track radio and an Android media entertainment center for navigation in the CitiCar. I’m having a difficult time determining where I should put them. I don’t have much space available on the dashboard to mount things, or the support to mount anything with some weight. I’m considering using one of the little radio modules instead.

I was able to wire the little radio up to work with both five and 12 volts, as advertised. The radio works, Bluetooth hooked up without a problem, and I was able to get MP3 files playing from a micro SD card. One thing of note is that I definitely need an amp. The little radio can put out a signal, but any speaker I try is so low, it is difficult to hear. The voltage supplied to the radio does not make a difference.

WAYPOINTODOMETERDISTANCE
Home1,134.1
Town Square1,138.03.9
Home1,141.93.9
Total7.8
RECHARGEENERGYCOSTDURATION
RatekWh9.85¢0.46 mph
Total2.21 kWh22.4¢17:00
Per Mile283 Wh2.9¢02:10

Under pressure

External TPMS sensor

The TPMS monitor arrived. The packaging looked like it was opened along the way going through customs.

It was fairly easy to install. Replace tire stem caps with little knobs. An alarm went off almost immediately as I put one on. I changed the units of measurement so the pressure and temperature were set to PSI and Fahrenheit.

TPMS host display

My tires were setting around 20 psi. The maximum pressure for the tires is rated at 51 psi.

I did some quick research and found most cars have a pressure around 32 psi, and that the door should have a sticker with the recommended tire pressure. I only saw the sticker with the VIN on it. I dug through the owners manual and found that Sebring-Vanguard recommended a tire pressure of 32 psi. Inflated the tires to 35 psi.

RECOMMENDED TIRE PRESSURE

The recommended tire pressure for standard and radial tires, front and rear is 32 psi. A lower tire pressure will give a softer ride, but a lower speed and ranger a higher tire pressure gives better speed and range.

CitiCar 1976½ Owners Manual, Sebring-Vanguard page 24

Power Transmission

Along with receiving the majority of parts by the end of next week, I’ve been researching battery cables. The first thing was to identify the amps going through everything.

DeviceAmpsPeak
Charger2020
Battery Monitor350500
4 Battery Modules4 * 250
1000
4 * 400
1600
Battery Switch350
600@5 min
1200@30 sec
1200
Fuse400400
Contact Solenoid650650
Motor Controller380
420@5 min
500@2 min
575
Reversing Contactor400400
Motor52-584584
Max Amps Allowed350400
Amperage that devices can produce, handle, or draw in the circuit

The fuse does not allow any more than 400 amps supplying the motor. From here, I was able to get a general idea of how large the battery cables need to be.

In addition to amps, I also had to take voltage drop into consideration. To do this, you need to know the length of the full path in circuit – battery to motor, and back again. I took some string and laid it out in a large loop around the bench seat. It came out to roughly nine feet.

The parameters are 48 volts @ 400 amps running along nine feet of cable. I found a calculator and put in the following:

InputValueCalculated
MaterialCopper
Gauge2/0 AWG
00 AWG
Voltage48 VDC
1-way circuit length4.5 feet
Load400 amps
0.288 VDCVoltage Drop
47.712 VDCVoltage at Load
0.6%Voltage Drop
133100
circular mils
Wire cross section

It appears 2/0 AWG wire will handle the maximum load the fuse will allow with a minimal voltage drop.

In other resources, I’m finding that 00 gauge is often rated for a maximum current of 186 amps, and that you should never exceed 80% of the rating (148.8 amps). Even a 4/0 wire will only be rated for 380 amps max.

In this scenario, it feels like the wire will melt before the fuse breaks. Things that confuse me are that the information that I’m finding is often for bringing electric into a house. I often look at how golf carts are wired up, but they are often working with 2 AWG wire, which is much smaller than 2/0 AWG.

To support 400 amps, I think I would need 500 kcml / 500 mcm of copper wire rated for 90°C. It looks like it costs roughly $14/foot. The wire is thick – as in power lines on telephone poles. I wouldn’t have the ability to afford tools to cut, crimp, and bend the stuff. Besides speed, I think modern EV’s go with higher voltage systems to reduce the amps needed, thus reducing the size of the wire.

The motor controller supports current limiting, so I could force it to use no more than 148.8 amps if I desired.

Someone local that I met on the maiden voyage has a few tools and supplies to help out with that they had used on their own EV.

In other news

  • D & D Motor Systems is shipping my motor.
  • Popular Science, June 1975 has been shipped
  • The portable EVSE has been shipped
  • I need to do some research on plug breaking / dynamic braking
  • I may need to contact D & D Motor Systems or Alltrax to see if they have a field map for my specific motor / controller.

Popular Science Mechanics

Popular Mechanics July 1974 cover

Today I received a Popular Mechanics magazine from July 1974 with a five page article for the CitiCar. I did a bit more research and found another magazine in the archives. I found a used copy of Popular Science for June 1975 (page 61-63) and made a purchase.

An adjustable angle antenna arrived for the car. I’ve already been successful installing another, so it’s not needed now.

Lots of critical components to replacing the power train are about to arrive by the end of next week.

  • Chevy Volt Battery Module Charger – Monday
  • Two Chevy Volt Batteries 48 volts, 50 amp hours – Monday
  • Two Bluetooth BMS – Monday (same package as batteries)
  • Replacement Portable EVSE – Saturday

Things to be shipped soon

  • ZERO J1772 adapter from Tucsan EV – pinged for a status update
  • New motor from D & D Motor Systems – any day ready to be shipped
  • Forward & Reverse switch – tracking label created…

After two months of researching and gathering parts, I’m getting a bit excited that I’ll be able to start testing things soon.

I think the main parts left for research are battery cables (make my own or purchase?), wiring harness, and a good set of tools for crimping.