Teddy and I had a destination with custard on our minds. It was going to be a long trip – perhaps the longest. We took the quickest route without stop-and-go traffic. Along the way someone started asking about the car while we were at a stop light.
Teddy patiently waits to eat his custard on an outing with the CitiCar
I had previously purchased a portable EVSE that turned out to be faulty. A return was accepted for a replacement. I dropped it off at the UPS store.
We arrived at B & L’s Custard, just a few feet from the UPS store. Teddy and I grabbed a quick lunch snack. I went with a small cup, and Teddy got his usual “pup cup”.
Teddy is always happy to get a cool treat when we go out. He was fairly distracted with a dog behind a fence barking at us. While we were there, a gentleman asked about the CitiCar while he was waiting for his order.
The ride home was pretty good. I had a little range anxiety, as I kept thinking the car might be starting to lose some power. It felt like the longest trip we’ve ever been on, pushing the car to its limit.
As I arrived home, I saw a USB charger for a cars 12 volt socket setting in front of my driveway. I had forgotten to clear off the roof before I left. Taking a quick look at the odometer, it registered our trip at 9.5 miles. It certainly was the furthest on one charge.
Contact
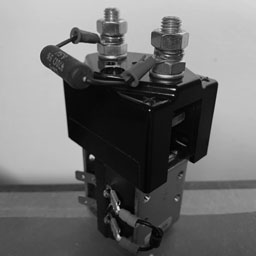
Curtis Albright SW180-93 contact switch
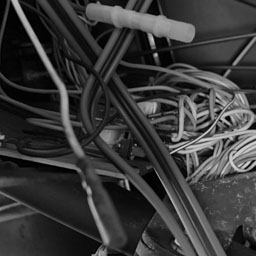
The contact switch arrived from D & D Motor Systems today. I wired it up to my regulated power supply and a multi-meter for a continuity test. When 12 volts was applied, I could hear something, but nothing was moving and contact wasn’t being made. Bumping up to 22 volts, the contact started to move half way. At 32 volts it was almost instant. Unfortunately, it appears that the coil is meant for 48 volts rather than 12. I’ll have to rethink how I’m going to set things up – potentially using relays, or purchasing a new switch.
Other news
I ordered a PlastiFix kit and Super Clean to prepare for repairing cracks in the CitiCar’s body.
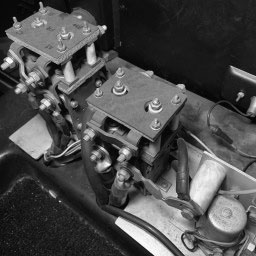
The motor controller for our little CitiCar has arrived! This is what will allow us to get the most efficiency out of the motor. The new controller will send 48 volts letting the motor operate at its full power, but pulsed based on how far the throttle is pressed. This gives you a large amount of torque at any speed.
Vanguard multi-voltage speed control
The original motor controller is a contact switch that provides an uninterrupted supply either 48, 24, or around 18 volts to the motor. The same voltage is applied in both forward and reverse.
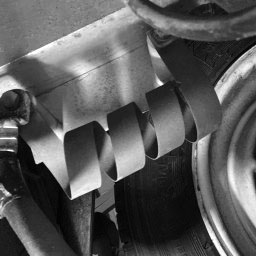
Nichrome resistor
The first benefit happens when you press the pedal into the the first step. The muti-voltage speed control provides a low voltage by sending 24 volts through a large nichrome resistor. This resistor is often used for heating elements in toasters and deep fryers. Much of the energy is wasted as heat in the first voltage step. With the new motor controller, the full 48 volts is sent to the motor, but in very small pulses. Energy is used more efficiently rather than thrown away as heat.
Curtis PB-8 throttle potentiometer
CitiCar three step throttle switches
The next feature is with the throttle itself. The CitiCars have a three step throttle. There are three contact switches that close or open based on how far you press the accelerator pedal. I’m replacing the CitiCars throttle switches with a potentiometer, known as a pot box. This lets me gradually control the speed. With the existing setup, I have to keep switching between each switch position to control speed so I don’t go too fast or too slow.
When I press the throttle now, the motor immediately jumps with a lot of torque to get to the new speed. This wastes energy. The new motor controller will ramp up the speed gradually in a more efficient manor. It also has the ability to control how many amps are supplied to the motor so that I don’t blow a fuse. The original CitiCar controller lets the battery directly connect to the motor, letting the motor draw as any amps as it needs until a fuse is blown, or the load demand is decreased.
With the new controller, a complex switching of the batteries between a 48 volt and 24 volt configuration is no longer needed. The nominal voltage of the battery bank is simply 48 volts, all the time.
Next Steps
I don’t have everything just yet. There are still a few things that I need before I can switch over to the new setup. Until then, I’ve started reading over the schematics. I have planned out how to wire up the batteries to the motor and controller. I need to measure out new battery cable lengths and size of terminals to fit everywhere.
I purchased an F-N-R (Forward and Reverse) switch to swap the motors connections when traveling in reverse. Some owners just use the original CitiCar contactor for this. Rather than rely on old hardware, I purchased a new switch rated with the amperage that I needed along with suppression diodes. I also ordered a contact switch with a diode and pre-charge resistor.
I was messing up on the coil voltage when ordering switches. I’m working with two voltages – 12 volts and 48 volts. 48 volts is for the motor, but the voltage is also stepped down to 12 volts to control lighting, switches, and accessories. It gets confusing when ordering equipment because it’s not clear which voltage to choose from, since the equipment itself also works with two separate voltages. In the end, make sure its the accessory voltage for the coils (12 volts in my case), or you’ll need to use relays to control your relays.
Initial planning stages of how to wire up batteries, motor, controller, fuse, and switches under the seat.
Voltage
Alltrax does provide a cheaper controller that works with up to 48 volts. However, I was told that the motor I am getting would be capable of running off of 72 volts as long as there was plenty of forced cooling. In that scenario, I wouldn’t need to buy a new controller – just a new set of batteries. Batteries don’t last forever. If there is one thing to know, it’s that voltage equals speed. The more volts you have, the faster you can go.
In other news
D & D Motor Systems responded that my motor will be ready to ship in 2-3 days
D & D Motor Systems has shipped out my contactor switch
I’ve been purchasing misc stuff from AliExpress
Hazard Light Switch
GPS Speedometer
Switch panel for a racing car engine (race mode – alltrax user mode)
Flashing relay switch
12v socket TPMS
Car Bluetooth MP3/USB/SD/FM/AUC decoder board audio modules
Current meter battery capacity monitor
Two more 48v Chevy volt battery modules have been shipped
I’ve filled out a return/replacement request for my portable EVSE
The lithium charger might be drop shipped sometime at the end of the week
Waiting for Zero J1772 adapter with C-19 plug from Tuscan EV
EV Drives is processing my order for a F-N-R switch, and has updated the coil voltage
I was able to connect to the Alltrax controller via USB
A cassette adapter arrived. Plans are to pull out the head and throw it into an 8-track tape.
A few magazines arrived with CitiCar articles in them, and posted on the Magazines page.
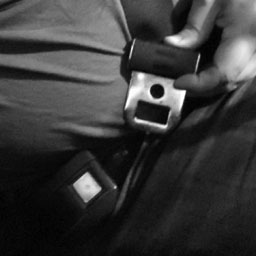
As of this morning, I’ve lost 100 pounds this year. I started losing weight so that I could increase range and fit in the CitiCar easier. I couldn’t even get the seat belt to buckle when I first got it.
Too big for a CitiCar seatbelt
Before and after photographs losing 100 pounds.
Ice Cream Run
I really wanted to get some local ice cream yesterday. I enjoy training Teddy with ice cream at the park. It was time for another adventure. Teddy and I arrived downtown to find that main street was blocked off again. I took a detour and parked behind the buildings on Main street.
Band with a harmonica
Teddy and I walked over to the town square and meandered through the park. While we were there, a small band was playing some music on the side of the road. One of the guys had a harmonica. We sat down on the curb and listened for awhile. I kept giving Teddy back scratches and massages.
It was time that we headed over to C & C Frozen Treats for ice cream. In front of the shop, there was a dunking booth with a giant teddy bear setting on the seat, and some pie throwing cut-outs for people to stand behind. The little shop was packed with kids. We waited for people to leave before going inside. The dairy-free choices are often limited, but good. I got a quart of brownie ice cream to take home. Teddy got a scoop of strawberry mango.
It was getting late and I wanted to get home before dark. I decided to stop at the post office on the way back. I hadn’t been there to pick up my mail for roughly eight months. When I opened my PO box, I found that it was packed tight.
Storage Idea
Arriving home, I started working on an idea to utilize the empty space in the CitiCar a bit better. I wanted a place to install some car speakers, a camera, lights, and a few other things. Nothing really seemed to be ideal to do anything.
I can’t get anything around the roll bars to mount things onto. There isn’t anything to clip onto. Nothing is magnetic, and I’ve had trouble getting adhesives to stick. It’s difficult to mount anything.
Mocking up cabinets between the CitiCar frame
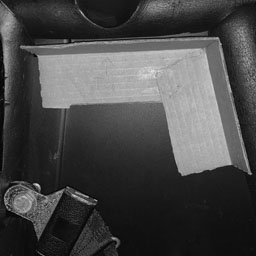
I got some inspiration when thinking about how my camping trailers had been built in the past. Almost every spot available is made into cabinets or made available in some clever way for storage.
I made a template of the area between the roll bars in the back. I decided to work on making an area that can have doors, drawers, hooks, and some magnetic metal bits to clamp, affix, or hook things onto. I’m mocking everything out using cardboard for now. I’ll upgrade to the final materials once I’ve got it all worked out.
Other News
I purchased an Alltrax SR-72500 Series Motor Controller (SR72500) and a Albright SW180 48 volt Solenoid Kit with a resistor and diode. I missed a call from D & D Motor Systems regarding the solenoid kit. I called back and left a voice mail and later followed up in an email with details for what I was using it for.
A few magazines arrived.
Hope on Wheels: New Cars for the Gasless Era, Douglas Bartholomew, New York Magazine, May 21, 1979, pages 38 – 42
The Electric Tropica, Frank Markus, Car and Driver, March 1994, pages 95-97
A Shocking Discovery, Pat Foster, Hemmings Classic Car, September 2018, page 38
I’ve been trying to flush the differential fluid in my cars axle. It’s been more than six months since the car came off of the production line in 1976. I’ve been unable to do it without the proper tools to open the fill plug.
My Allen wrenches arrived today. I opened the drain plug and removed all of the differential fluid. After cleaning the plug, I tightened it back on and started pouring gear lubricant into the fill plugs hole. A quart was not enough. I put in an order for some more and filled the old bottle back up with the fluid that just came out.
Drain Plug
5/16″ hex
Flow Plug
3/8″ hex
Fluid
75W-90, 1½ quarts Gear Lubricant
SIX MONTHS AFTER PURCHASE AND EVERY SIX MONTHS THEREAFTER
* Check differential fluid level. Use 90 weight Hypoid gear oil. Fill to top. In cold weather lighter weight fluid may be used. It is not advisable to mix different weights. When changing types of oil, flush system. Use no lighter than 30 weight oil.
Teddy and I hopped into the car with a destination of Gertrude Miller Community Park. I positioned the dash cam so that it had both Teddy and myself in full view, as well as the dashboard. I heard something wearing a bit along the way. I wasn’t sure if it was the rear driver breaks, the motor, or something to do with the differential.
We spent some time at the park and then headed to Advance Auto Parts to pickup the gear lube. I brought the old bottle back with the 45 year old oil that came out of the car. They had me follow them into the back of the store and dump it into a large metal bin with a mesh over the opening. They wouldn’t take the container itself.
ICE parking at an EV charging station
With that, we headed over to the town square, only to find a large event with live music playing. It was the big summer season finale of the towns summer concert series. Vinyl Tracks was playing Beatles songs in the gazebo.
While looking for parking, I saw a big ICE truck parked at an EV Charging space. I got a little annoyed that this vehicle was ICEing an EV charging spot. Although the CitiCar that I was driving is an EV, I wouldn’t park there unless I was using the charger. No parking was available at the town square, so we went to another parking lot nearby and came back to enjoy the park.
Blue Ridge Arts Council Flyer for 2020 Summer Concert Finale featuring Vinyl Tracks
Social distancing at a concert
The concert was enjoyable to listen to as we walked through the park. Everyone was spread out and practicing social distancing. A few people wore masks. We walked past someone enjoying the music from their car.
Teddy and I went across the street to get some ice cream at C & C Frozen Treats. The little shop was packed with people due to the concert across the street. We didn’t bother going inside.
Ice Cream!!!
On the way home, I saw an ice cream truck in my community. I stopped the CitiCar on the side of the street and waved the truck down. I purchased an ice cream sandwich that looked like a big Oreo cookie. I got my ice cream after all!
Differential flow plug on a CitiCar
We arrived home at last. I checked the mileage, voltage, reset the kilowatt meter, and plugged in the battery chargers. The axle was a bit hot. I gave it some time to cool down. I came back and topped off the gear lubricant in the differential pan through the flow plug.
Video
CitiCar trip to the park
WAYPOINT
ODOMETER
DISTANCE
Home
1,106.6
Gertrude Miller
3.2
Advance Auto Parts
1.2
Town Square
0.4
Home
1,115.3
3.9
Total
8.7
RECHARGE
ENERGY
COST
DURATION
Rate
kWh
9.85¢
0.60 mph
Total
2.30 kWh
23.4¢
14:30
Per Mile
265 Wh
2.7¢
01:40
Other News
The motor bumper arrived today as well as a torque wrench.
I had made about 15% profit in my dividend portfolio that I started out late last year. I sold off everything I had invested in it, so that it only consists of profit now. I’m investing the majority of the money into my other portfolio consisting of disruptive tech and a couple EV companies that I follow almost daily.
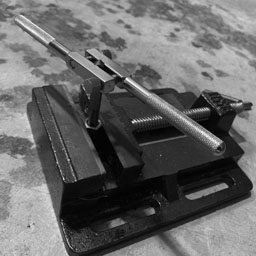
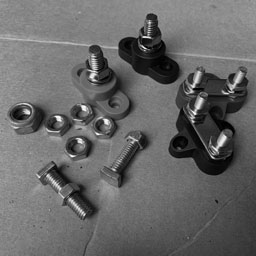
It seems like I’ve been constantly getting nowhere with replacing the battery terminal nut. Everything I’ve purchased for battery terminals has been too small. I have a variety of nuts on order, but they won’t be here for a few days.
Tapping a nut
While cleaning up the garage over the weekend, I came across a little 24 piece tap and die set. I considered that maybe I had stripped the threading in the nut, and decided to try tapping it. I could get the CitiCar back on the road quicker, and the nut was already useless at this point.
I grabbed a little table vice to hold the nut in place, and opened up the tap and die set. I rolled my eyes as soon as I realized the set was in metric. I probably got this when I was building the Tricolour RepRapPro 3D printer based on plans from the UK. I may eventually end up buying a larger set that also includes both metric and SAE.
I first tried a 9 milometer tap. I could feel the bite as I slowly bit through the metal. Once I was able to freely spin the tap, I tried putting the bolt on the terminal.
Unfortunately, I came up with the same results as every other attempt over the past few days. Too small. I went ahead and tried the 10 millimetre tap. It was much harder, but … success! The bolt slid on the battery terminal just fine. I was able to connect all of the battery cables.
I went ahead and charged all the batteries for our next adventure in the CitiCar. In the meantime, I started looking at how to hook up the EVSE with a transformer that could connect to a public charger and convert the power to 120 volts. From here, the plan was to connect my five individual battery chargers.
EVSE fault
I was quickly blocked as soon as I plugged the EVSE into an outlet. The charger was blinking to indicate that it was protecting from a low/high voltage. I checked that the circuit was wired correctly. I also verified the voltage was in range at 124 volts. I tried outlets around the house on other circuits. I even plugged it into the back of my computers APS power supply to ensure a clean cycle of power.
Chevy Volt battery module cut on side
I cut the bottom edge off of another Chevy volt battery module. Although I had a hiccup with the EVSE, a few things are progressing fairly well today.
I think Teddy and I will be able to visit the park and grab some Ice Cream tomorrow.
Video
EVSE Problems
Other News
Some button cell batteries arrived. I was able to fix Teddy’s talking ball. I replaced the battery in my calipers, but the digital readout wouldn’t turn on. I took a closer look and found that one of the contacts looked as if it would touch both the positive and negative parts of the battery. It looked like it was bent down and curved a little. I thought it was a spring when I first saw it. I flipped it up on its side. It matched the curve of the battery and… it broke off.
I remember it was only a few bucks. It still works manually. Perhaps I should invest in something with more quality the next time I go looking for one.
Products
Irwin Industrial Tools 26313 Metric Tap and Hex Die Set, 24-Piece
Megear Level 1-2 EV Charger(100-240V,16A) Portable EVSE Home Electric Vehicle Charging Station Compatible with Chevy Volt, Nissan Leaf, Fiat, Ford Fusion (NEMA6-20 with Adapter for NEMA5-15)
NEW Lithium Ion Chevy Volt 48vdc 2kwh 50ah battery Golf Cart Off Grid Solar EV
DEAL INDUSTRIES INC. 61-501 Receptacle Tester with GFCI, Black
WEN 423DPV 3-Inch Cast Iron Drill Press Vise
Winkeyes 0-6 Inch Digital Vernier Caliper with Inch/MM Conversion Large LCD Screen and Stainless Steel Body Vernier Caliper Tool for Small DIY and Homework, Coin Battery included, 150mm
Pet Qwerks Talking Babble Ball Interactive Pet Toy – Wisecracks & Makes Funny Sounds, Electronic Ball that Talks & Makes Noises – Avoids Boredom & Keeps Your Dog Active
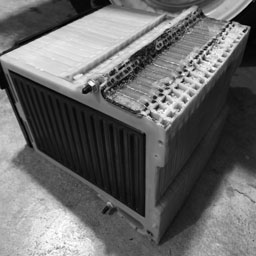
With all of the projects on the CitiCar, one of the most important ones is to upgrade the batteries to Lithium. I found some Lithium Ion Chevy Volt batteries. I took the measurements, made some cardboard cutouts, and tried to plan out where the batteries could sit. I just barely could not fit two on each side. I was hoping that maybe the measurements were off.
I took delivery of two lithium batteries a couple weeks ago. Each module was configured to deliver 48 volts at 50 amp hours, for a capacity of 2 kWh. I spent some time placing the battery modules in different positions in the CitiCars’ battery tray to determine if I could fit more than two batteries under the seats for more range and less demand on each battery.
Chevy Volt battery module on lip at edge of CitiCar battery tray
It wasn’t exactly perfect, but I saw a way to make them fit. I went ahead and ordered two more batteries. I could almost fit a fifth one, but it was simply too tight for my comfort, and I could use the space for other things such as a motor controller, DC-to-DC converter, and possibly the charge controller as well.
Dremel cutting edge of battery module
Tonight I started out trying to cut the bottom flange of the batteries where the batteries coolant had passed through. I watched a few videos on people tearing down the batteries to get an idea where I could cut without coming close to the Li-Ion cells. I got out my rotary tool and went to town.
It quickly turned into a challenge. The layers to cut through are composed of plastic, rubber gaskets, coolant plates, and coolant still remaining within. The smell was pretty awful as well.
Cutting battery module with a hack saw
The rotary tool was having a tough time and was getting too hot to handle. I started using some metal shears and a wrench to chip away a little and strong arm it a bit. I wasn’t getting anywhere fast. In the end, I used a hacksaw.
Battery module on its side with side of coolant tunnel cut off
The hacksaw was quick and clean. Rather than having black rubber melted on everything, I could see the profile of the rubber gaskets and cooling plates against the plastic and air pockets.
It took a bit longer to finish off the bottom cut since it was thicker, and cut into an unused brass threading. I believe it was originally used to both keep the batteries together, and keep the water intake bolted onto the battery. Looking back at the
Chevy Volt battery with bottom right coolant tunnel cut off
Other News
In other news, my 10mm Hex/Allen wrench came in today. It was too big to insert into the axles fill plug. Going down, 9mm is a non standard size. I purchased a set that contained contained a wide range of sizes in both metric and SAE with balls on the end of the arms. The SAE set includes 3/8″ and 5/16″, to which I hope one will fit. It’s also got a set of star wrenches, but I’ve rarely had a use for them in the past.
Some nuts for the battery terminals should arrive tomorrow, allowing me to drive the car again.
I ordered some magazines with articles about CitiCar/Comuta-Car:
Consumer Reports October 1976
Hemmings Classic Car September 2018
Car and Driver March 1994
New York Magazine May 21, 1979
Popular Mechanics July 1974
Golf Car Options Magazine January 2018
Videos
Making a battery fit into a CitiCar
Fitting lithium batteries into the CitiCar
Products
These are the products I’ve purchased that are mentioned.
NEW Lithium Ion Chevy Volt 48vdc 2kwh 50ah battery Golf Cart Off Grid Solar EV
Dremel 4300-5/40 High Performance Rotary Tool Kit with LED Light- 5 Attachments & 40 Accessories- Engraver, Sander, and Polisher- Perfect for Grinding, Cutting, Wood Carving, Sanding, and Engraving
Stanley Hacksaw 24 Tpi 12 “
Columbian By Wilton Aviation Snip Set 3pc. 30676 Straight, Right, Left
Consumer Reports October 1976 Hemmings Classic Car September 2018 Car and Driver March 1994 New York May 21, 1979
Golf Car Options Magazine – January 2018
Popular Mechanics July 1974
REXBETI Hex Key Allen Wrench Set, SAE Metric Star Long Arm Ball End Hex Key Set Tools, Industrial Grade Allen Wrench Set, S2 Steel
I heard back from D&D Motor Systems this morning. It seems the motor is a stock motor – no temperature or speed sensing. I’ll need to figure out what to do in regards to the speedometer.
One of the other CitiCar owners I’ve been speaking with mentioned he was considering using a speedometer based on GPS. My concerns with GPS is in situations that you are unable to receive a signal. I want to know my speed immediately, in real time, with accuracy, regardless of where I am. I’m lacking in the accuracy department at the moment where my speedometer seems to think I’m going 4 miles faster than I really am. Perhaps I need to inflate my tires.
Along with a few answers to my questions, D&D Motor Systems also sent along a performance report of the motor.
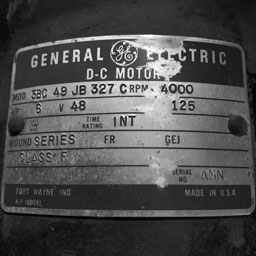
Engineering Performance Test for ES-40D-56
The stock motor that came with the car has the following information on its plate:
Ratings Plate on a stock 6HP CitiCar Motor
RPM
4000
HP
6
V
48
A
125
Wound
Series
Time Rating
INT
Class
F
MOD
5BC 49 JB 327 C
Serial No
AMN
CitiCar specifications on a 6HP motor
I’m not clear on how to compare motors. At first, I thought it was simply comparing which motor had the most horsepower. However, HP is variant based on the load. Voltage is similar. RPM’s… Let’s just say there is so much involved when comparing motors. I had to start reaching out for something to compare.
Comparison
Stock
D&D Motor
RPM
4000
1444 – 5020
Amps
125
52.5 – 583.5
Horsepower
6
in: 3.34 – 30.70 out: 1.90 – 19.24
I feel a bit confused. The motor is both better and worse… I’m certain I’m comparing apples to oranges here since I don’t have a similar table for the stock motor. I’ve heard from another CitiCar owner that the amps can shoot up pretty high on the stock motor while going up a hill. This brings me to wonder, how did General Electric know what to stamp into the motor plate?
As stated in the owners manual, the CitiCar has a 250 amp fuse on the motor.
The same is true driving up long, steep hills. By driving in first speed, and sometimes second speed, under these conditions, you are likely to blow the Citicar’s 250-amp fuse located in the controller box behind the seat.
CitiCar 1976 ½ Owners Manual, Sebring-Vanguard, 1976, page 19
The Mother Earth News article about the CitiCar in Israel had also mentioned the range of amps with the stock motor.
Although initial current draws can reach 500 amps, the average pull at cruising is around 100 amperes.
Israel’s Solar Powered Car, The Mother Earth News, September/October 1980, page 120
Even at that rate, it appears that the new motor will have cruising speeds at 50 amps; half of what the CitiCar can do.
I plugged the performance numbers for the ES-40D-56 motor into an excel spreadsheet and started making some graphs. I like visuals, and I thought it may reveal a pattern and help to compare against with the stock motor that came with the CitiCar.
I saw lots of compounding curves. I wasn’t sure if I was onto something, but I started out comparing RPMs. At 4000 RPM, I assumed the CitiCar motor would use 125 amps and deliver 6 Horsepower – the ratings on its motor plate.
I tried to make a few formulas in the spreadsheet. At 4000 RPM, the new motor would be using around 75 Amps and 4.7 HP. If that’s the case, it’s got a much higher efficiency at only half the amps with less HP to maintain that load/speed. Unfortunately, I’m thinking in a linear scale, so at 4000 RPM’s, it would be just a bit higher for HP and amps – but not by much.
I’m learning about electric motors, and slowly grasping at how to compare them. I believe it will be an improvement. If my calculations are correct, this means that the motor can go further on the same amount of energy.
Coupling the improvement in the motors efficiency with an actual motor controller will further extend the range. I also purchased two more batteries last week to double the range and lessen the load on each of the Chevy Volt batteries.
Other News
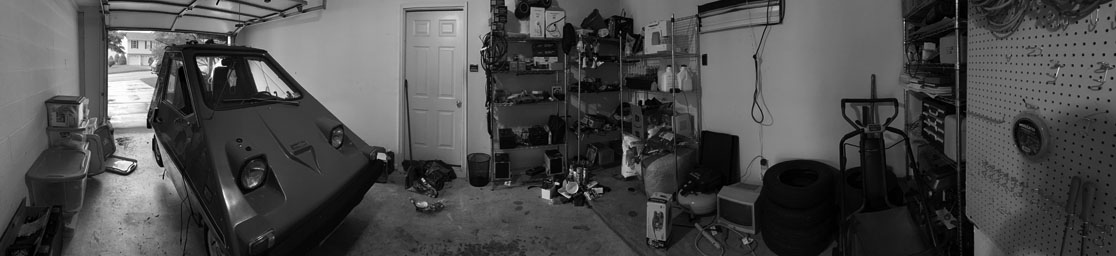
In other news, the garage has been cleaned to a point that it is actually organized. Shelving units for indoor gardening have been broken down and moved back into the garage. I have a whole shelving unit dedicated to CitiCar parts. I even have my screw drivers all in one place. Usually I’m having trouble just finding one screwdriver – but now I’m having trouble fitting them all into one container.
Holding CitiCar motor in place
After a great deal of effort, the stock motor is back on the car. The thing is very heavy and difficult to move around while you are laying on the floor.
Battery terminal with nut
A battery nut arrived in the mail, but again – it’s too small. I decided to order nuts that are 7/16 in size, as well as in metric for M8 and M10. I feel like one of those has got to work.
I started on replacing the differential fluid over the weekend, but I got stuck trying to remove the breather cap – which you shouldn’t do. After watching a few videos, I found the filter and drain plugs. I had three #8 Allen wrenches to remove the drain plug, but I had to order a #10 for the filter plug.
I purchased an old General Electric Motor Bumper for a club car to put inside the armature after I saw a video of someone mentioning not to forget to transfer the bumper into your new motor. It’s supposed to help make the motor a little quieter. Maybe… we shall see. I like the wine the motor makes. I just didn’t see it inside my motor and would like to try it out.
I also started playing with an Aukey DRA5 dash cam.
Pico 0852PT 3/8″ Stainless Steel Battery Hold Down Stud Nut 2 per Package
Too small
EKLIND 14620 10 MM Long Series Hex-L Key allen wrench
Filter Plug
Chevy Volt BMS w/Bluetooth for 48v 12 cell battery w/cell balance & charger cont
goes with batteries
NEW Lithium Ion Chevy Volt 48vdc 2kwh 50ah battery Golf Cart Off Grid Solar EV
more range, shares the load
Club Car Electric GE Motor Bumper (Fits 1982-Up)
Curious on quiet noise
AUKEY Mini Dash Cam 1080p Full HD Dash Camera with 1.5” LCD Screen Car Camera with 170° Wide-Angle Lens, G-Sensor, WDR, Motion Detection, and Clear Night Recording
The under dash courtesy light in the CitiCar is not turning on when the switch is changed from one position to the next.
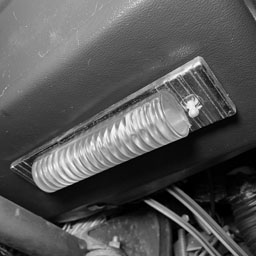
Open up
The cover was a bit difficult to remove. I slid it back and forth and tried squeezing the dome. Eventually I was able to remove it by putting pressure on the bottom side, pulling it up towards me, and lifting out.
Profile
Looking at the side of the plastic cover, it appeared that one of the tabs had a larger notch than the other.
Twist
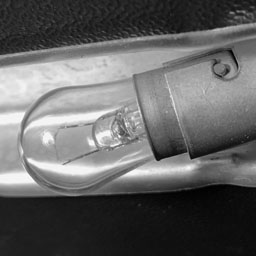
The bulb was fairly easy to remove. Push it into the socket, turn counter-clockwise, and pull out.
Part Number
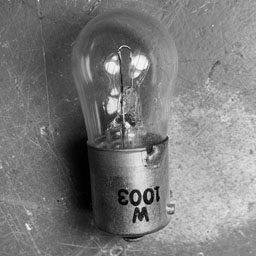
The incandescent bulb had W1003 clearly printed on its base. Being so clear, I suspect it’s not the original bulb.
I’ve been having some trouble finding this part other than vintage old “new” stock. I saw some LED bulbs that mentioned 1003 as well as a few other replacements.
BA15S
P21W
54-EX
63
93
93LL
97
97A
97LL
97NA
199
631
631LL
1073
1073LL
1141
1141LL
1156
1156A
1156ALL
1156NA
1159
1195
1295
1295NA
2396
3014
3497
3497LL
7506
7506L
7506LL
7533
12088
Replacement bulbs for W1003
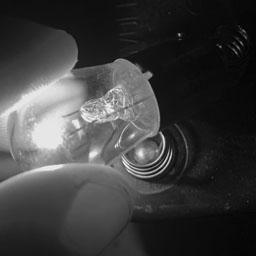
Test
Just to be certain, I tested the bulb itself to verify if it had burnt out. I placed it on the contacts of a six volt lantern battery. It lit up just fine.
The heat that it produced from such a low voltage is encouraging me to find a different solution that does not transform as much energy into heat.
Accessory
I thought maybe it was on the circuit for accessories, and therefore wasn’t getting any power.
I flipped the ACC switch on the CitiCars’ dashboard, but the light was still unable to turn on.
Disconnected
I started following wires. It was a mess, but I found that the accessory switch had a wire that wasn’t connected to anything.
I plugged two wires into each other, but there still wasn’t any power.
If it runs off of the main battery – this could be a problem.
Terminal Connection
One of the cars batteries to the motor is currently disconnected. I have a nut that refuses to go back onto one of the terminals and seems to be biting into the threads. Other battery nuts look different, and go on the terminal just fine.
Wrong Parts
I didn’t know the size, so I purchased a few battery terminals that I thought I would need once I started installing a few lithium batteries in parallel. Everything was too small.
I also found an old bolt in the garage – and it was too big.
Group 31
I didn’t want to keep buying battery terminals blindly. I started looking up nuts for the batteries group size.
Sure enough, there was a specific type of nut for it. It seemed limited in where you could find them, and a bit pricey.
At this point, I’m testing various connections for continuity. I received a notice that the battery terminal was shipped out this afternoon.
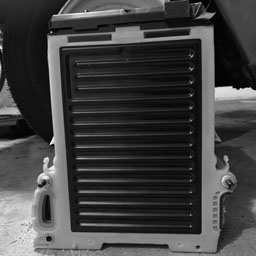
After discussing the trouble I ran into with a few other CitiCar/Comuta-Car owners, they provided a few solutions. Once installed, one of the owners had a vertical antenna that could be configured to stand at an angle. Another owner pointed me to an antenna he used for his own CitiCar. The product was a replica for a classic Volkswagen Beetle “Bug” / Bus.
The base of these antennas sits flush against the body and mounts using two screws. My guess, is that other than the roof, the beetle and van appear to lack a flat horizontal surface to mount a standard antenna. The beetle had theirs mounted vertically behind the drivers front fender. The bus had it mounted vertically on the its hood. The side mounted antennas had the benefit of being fairly secure due to the use of two bolts to mount them.
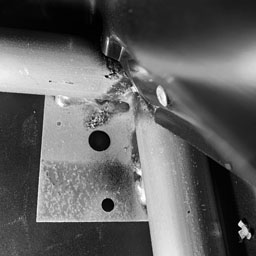
Aluminum plate to support CitiCar antenna
The aluminum plate had two separate holes in it. A larger one under the dimple, and a smaller one that went unused – or so I thought. I took the base of the Volkswagen antenna and stuck its screws against the plates holes. At this point, I was certain that Sebring-Vanguard had designed this car specifically for this style of antenna.
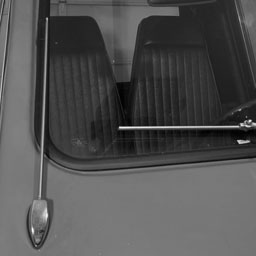
CitiCar antenna on passenger side
I marked the spot and drilled a smaller hole. I was a bit concerned about how the antenna seemed to overlap the passenger window along the edge. I did my best to align it, but the “impervious” aluminum limits your options.
Lock Washer
The antenna came with two screws and two washers. I was unfamiliar with one of the washers, which I believe is a lock washer or an overlap washer. Due to how thick the plastic and aluminum plate are, I wasn’t able to get the washer on. I was barely able to get the nut onto the threading.
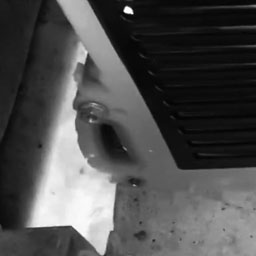
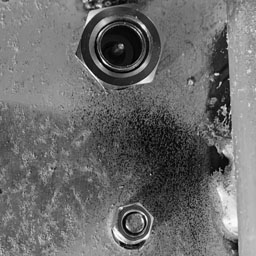
Nuts on threads for antenna
Antenna wire screwed into bolt
I was setting in odd positions with my back against the edge of CitiCar, looking strait up inside at the plate. With a pair of vice grips, I was slowly continuing to tighten the nut. I was trying to see if the threads on the end of the antenna wire would catch onto the bolt if I could tighten the nut down far enough. After quite some time, I was able to tighten the nut down and catch onto the threads.
My job was done. I have an antenna installed onto the car. Extending the antenna fully allows it to go above the roof. I’ll have to get an antenna ball topper to add some character – not that it needs any more than it already has…
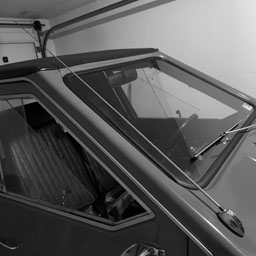
Volkswagen Beetle/Van antenna installed on Sebring-Vanguard 1976 SV-48 CitiCar