Tag Archives: Volkswagen

Volkswagen Antenna

Base of Volkswagen Beetle/Van antenna

After discussing the trouble I ran into with a few other CitiCar/Comuta-Car owners, they provided a few solutions. Once installed, one of the owners had a vertical antenna that could be configured to stand at an angle. Another owner pointed me to an antenna he used for his own CitiCar. The product was a replica for a classic Volkswagen Beetle “Bug” / Bus.

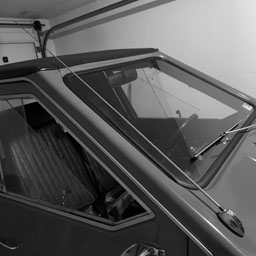
The base of these antennas sits flush against the body and mounts using two screws. My guess, is that other than the roof, the beetle and van appear to lack a flat horizontal surface to mount a standard antenna. The beetle had theirs mounted vertically behind the drivers front fender. The bus had it mounted vertically on the its hood. The side mounted antennas had the benefit of being fairly secure due to the use of two bolts to mount them.

Aluminum plate to support CitiCar antenna

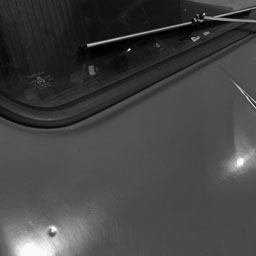
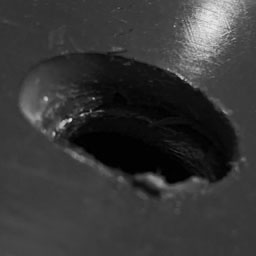
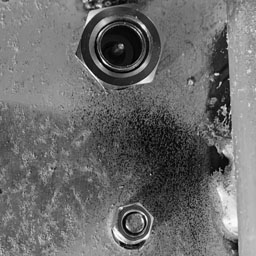
The aluminum plate had two separate holes in it. A larger one under the dimple, and a smaller one that went unused – or so I thought. I took the base of the Volkswagen antenna and stuck its screws against the plates holes. At this point, I was certain that Sebring-Vanguard had designed this car specifically for this style of antenna.

CitiCar antenna on passenger side

I marked the spot and drilled a smaller hole. I was a bit concerned about how the antenna seemed to overlap the passenger window along the edge. I did my best to align it, but the “impervious” aluminum limits your options.

Lock Washer

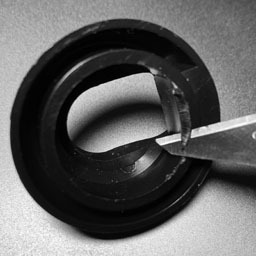
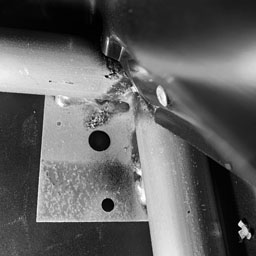
The antenna came with two screws and two washers. I was unfamiliar with one of the washers, which I believe is a lock washer or an overlap washer. Due to how thick the plastic and aluminum plate are, I wasn’t able to get the washer on. I was barely able to get the nut onto the threading.

Nuts on threads for antenna
Antenna wire screwed into bolt

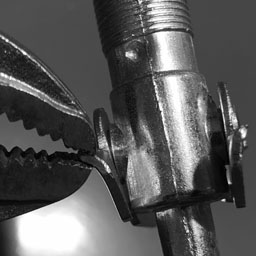
I was setting in odd positions with my back against the edge of CitiCar, looking strait up inside at the plate. With a pair of vice grips, I was slowly continuing to tighten the nut. I was trying to see if the threads on the end of the antenna wire would catch onto the bolt if I could tighten the nut down far enough. After quite some time, I was able to tighten the nut down and catch onto the threads.

My job was done. I have an antenna installed onto the car. Extending the antenna fully allows it to go above the roof. I’ll have to get an antenna ball topper to add some character – not that it needs any more than it already has…

Volkswagen Beetle/Van antenna installed on Sebring-Vanguard 1976 SV-48 CitiCar
Advertisement

Antenna Installation

Collapsed Antenna

I am hungry for some tunes. I was considering where I should place the antenna for the radio on the CitiCar. I’ve looked over quite a few videos and images. There are a few main places that the radio antenna is often placed:

  • Standing vertical next to passenger right headlight
  • Standing vertical next to passenger lower right window
  • Standing 45 degrees along passenger window
  • Standing vertical next to drivers left headlight (rare)

I liked the quirkiness of the placement next to the passenger headlight. I had a few concerns about how well a tall classic antenna would be supported against a plastic body and ran it past a few CitiCar and Comuta-Car owners.

A dimple

It seemed there was a variety of antenna placements among us C-Car owners. One of the owners mentioned that the body should have a dimple for where the antenna should be installed. Curious, I took a closer inspection and there it was – a dimple. Hardly noticeable unless you look for it.

Antenna support plate

It seemed like a weak spot compared to how ridged the plastic would be around the headlight. Intrigued, I went ahead and took a look at the underside of the body. Much to my satisfaction, I found that the manufacturer installed an aluminum plate specifically for this reason. It had a hole punched out, and I could faintly see the underside of the dimple in the center. The drivers side of the frame did not have a plate.

Drilling Cycolac

I started to get to work making a hole. This is old plastic. To prevent cracking, or tearing up the plastic, I started off with a small drill bit, and worked my way up in size.

Base of antenna

Finally, the hole was large enough for the threads to poke through. This is where I started to run into problems.

I purchased a classic car radio antenna. It seemed to support going up to a 45 degree angle. I was having a tough time getting it to go through far enough to start getting the nut onto the top. I removed the rubber grommet, but I shill had trouble. I flipped the metal supports upside down to help pull the threads higher.

Removing the guide

I found that I wasn’t able to set the antenna up to a full 45 degree angle because there was some plastic at the last part acting as a guide. It took awhile, but I was able to nibble away most of the excess plastic. I was able to get much closer to threading the nut onto the shaft.

Bending nubs

I was in a quandary. I decided it was time to take a bit more drastic measures. I picked up a set of vice grips and started bending the nubs on the top of the antennas base. It may not be much – but it’s something.

Something… but it just wasn’t enough.

I took a breather and considered my next stop. Rather than using an antenna that is fixed vertically on a 45 degree base, I started looking for antennas that could be adjusted at any angle. I found one online and put in a new order.

The hole…

For now, there is the hole.

Looking at me.

Unfinished.

Judging.

Update

One of the C-Car owners recommended a side mount antenna he had used from a Volkswagen Beetle. An order has been placed for one of those antennas as well.